I try to translate some of my favourite recipes for you. If you have any questions, ideas or improvements just let me know.
- Fancy Apricot Jam
- Veal ossobucco out of the Dutch Oven
- Lemoncurd or Cinnamon Knots – sweet
- Beanballs with fried rice an yoghurt dip
- Falafel Pizza with Hummus
- Gyros Lasagna
- Xmas cookies with Marzipan
- Salmon Filet on Pineapple
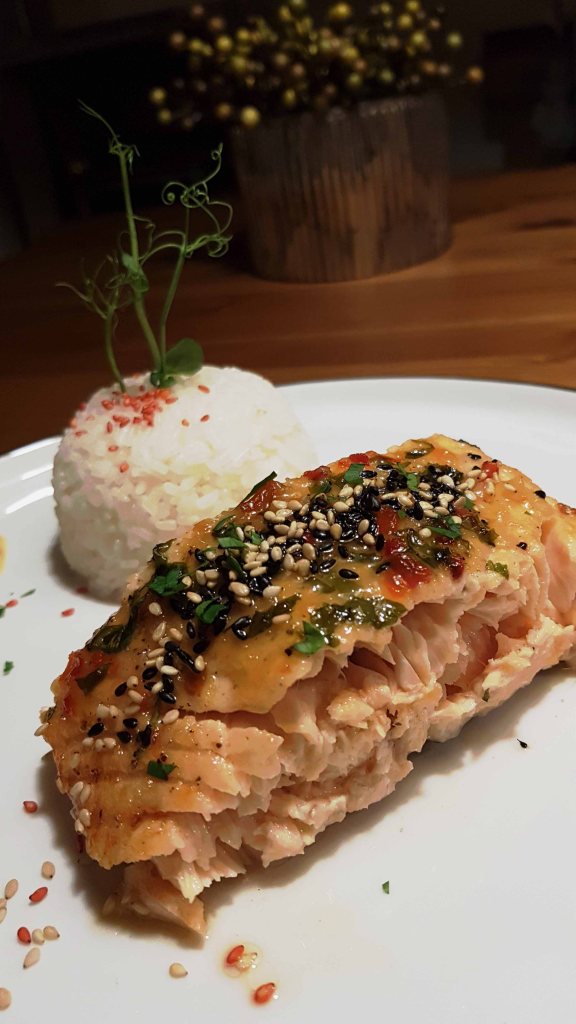
Salmon Filet on Pineapple
It makes my mouth water again spontaneously. Salmon filet on pineapple sounds pretty good, doesn’t it?
It’s a real show-off :0) although the effort is limited. But see for yourself.
Ingredients:
Salmon fillet with skin
Pineapple (best fresh, but you can also get it from a can)
salt, pepper
Glaze for the salmon:
3 tablespoons sweet chili sauce
2 tsp garlic, grated
2 tsp ginger, grated
2 tsp sesame oil, roasted
chili, finely diced to taste
3 tablespoons butter, melted
Side of gravy:
Pineapple
melted butter
sweet chili sauce
Chili
Garlic
Side dish:
Rice
Sesame seed
Wasabi and pea sprouts
Peel the fresh pineapple, remove the inner hard core, this works best with an apple cutter. Cut the pineapple into 5-10mm thick slices.
I have halved the slices because it is easier to put them together.
Put the pineapple slice on the baking tray.
Cut the salmon fillet into shape so that it fits on the pineapple bed. Season with salt and pepper and place on the pineapple slices.


You can now preheat the oven to 180°C top and bottom heat.
The glaze is done quickly.
Melt butter in a braid, add all the ingridients, mix and spread on the salmon fillet.
Put the salmon in the oven for about 25 minutes (core temperature 45°C), then add the grill and brown the salmon from above until it has a nice golden colour. When grilling the salmon the core temperature increases to the desired 50°C. The salmon is wonderfully juicy and to the point. It should not leak any stunted protein.
You can make the side sauce in between. Puree the pineapple with the melted butter and the spices in the blender.

A simple basmati rice goes wonderfully with it.
Sprinkle the salmon with sesame seeds before serving.
The icing on the cake are wasabi and pea sprouts, which catapult the dish to the next level. No kidding!


That was really a very fine dinner!
Next time I would prepare the salmon on pineapple on the cedar plank on the BBQ. I imagine that would be excellent!
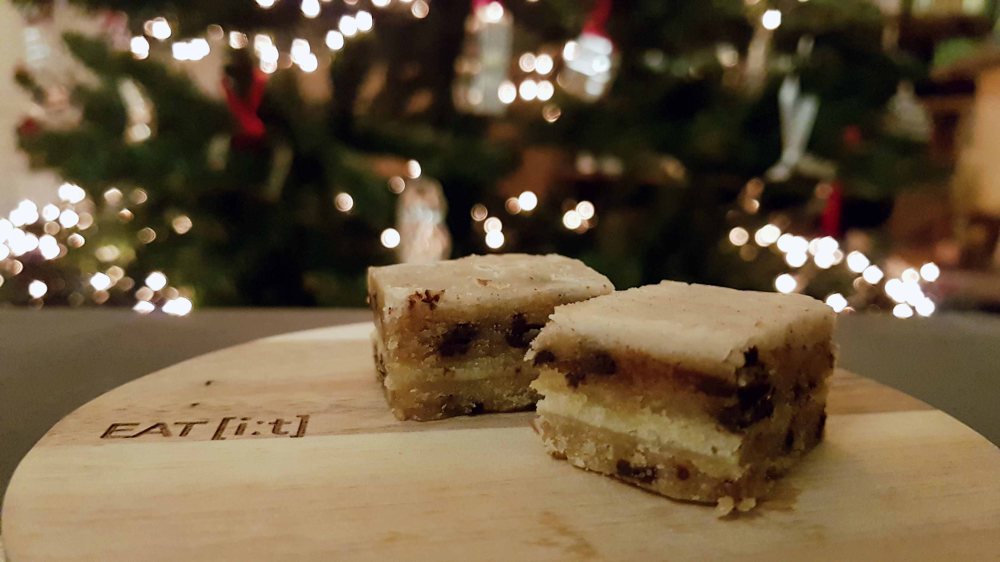
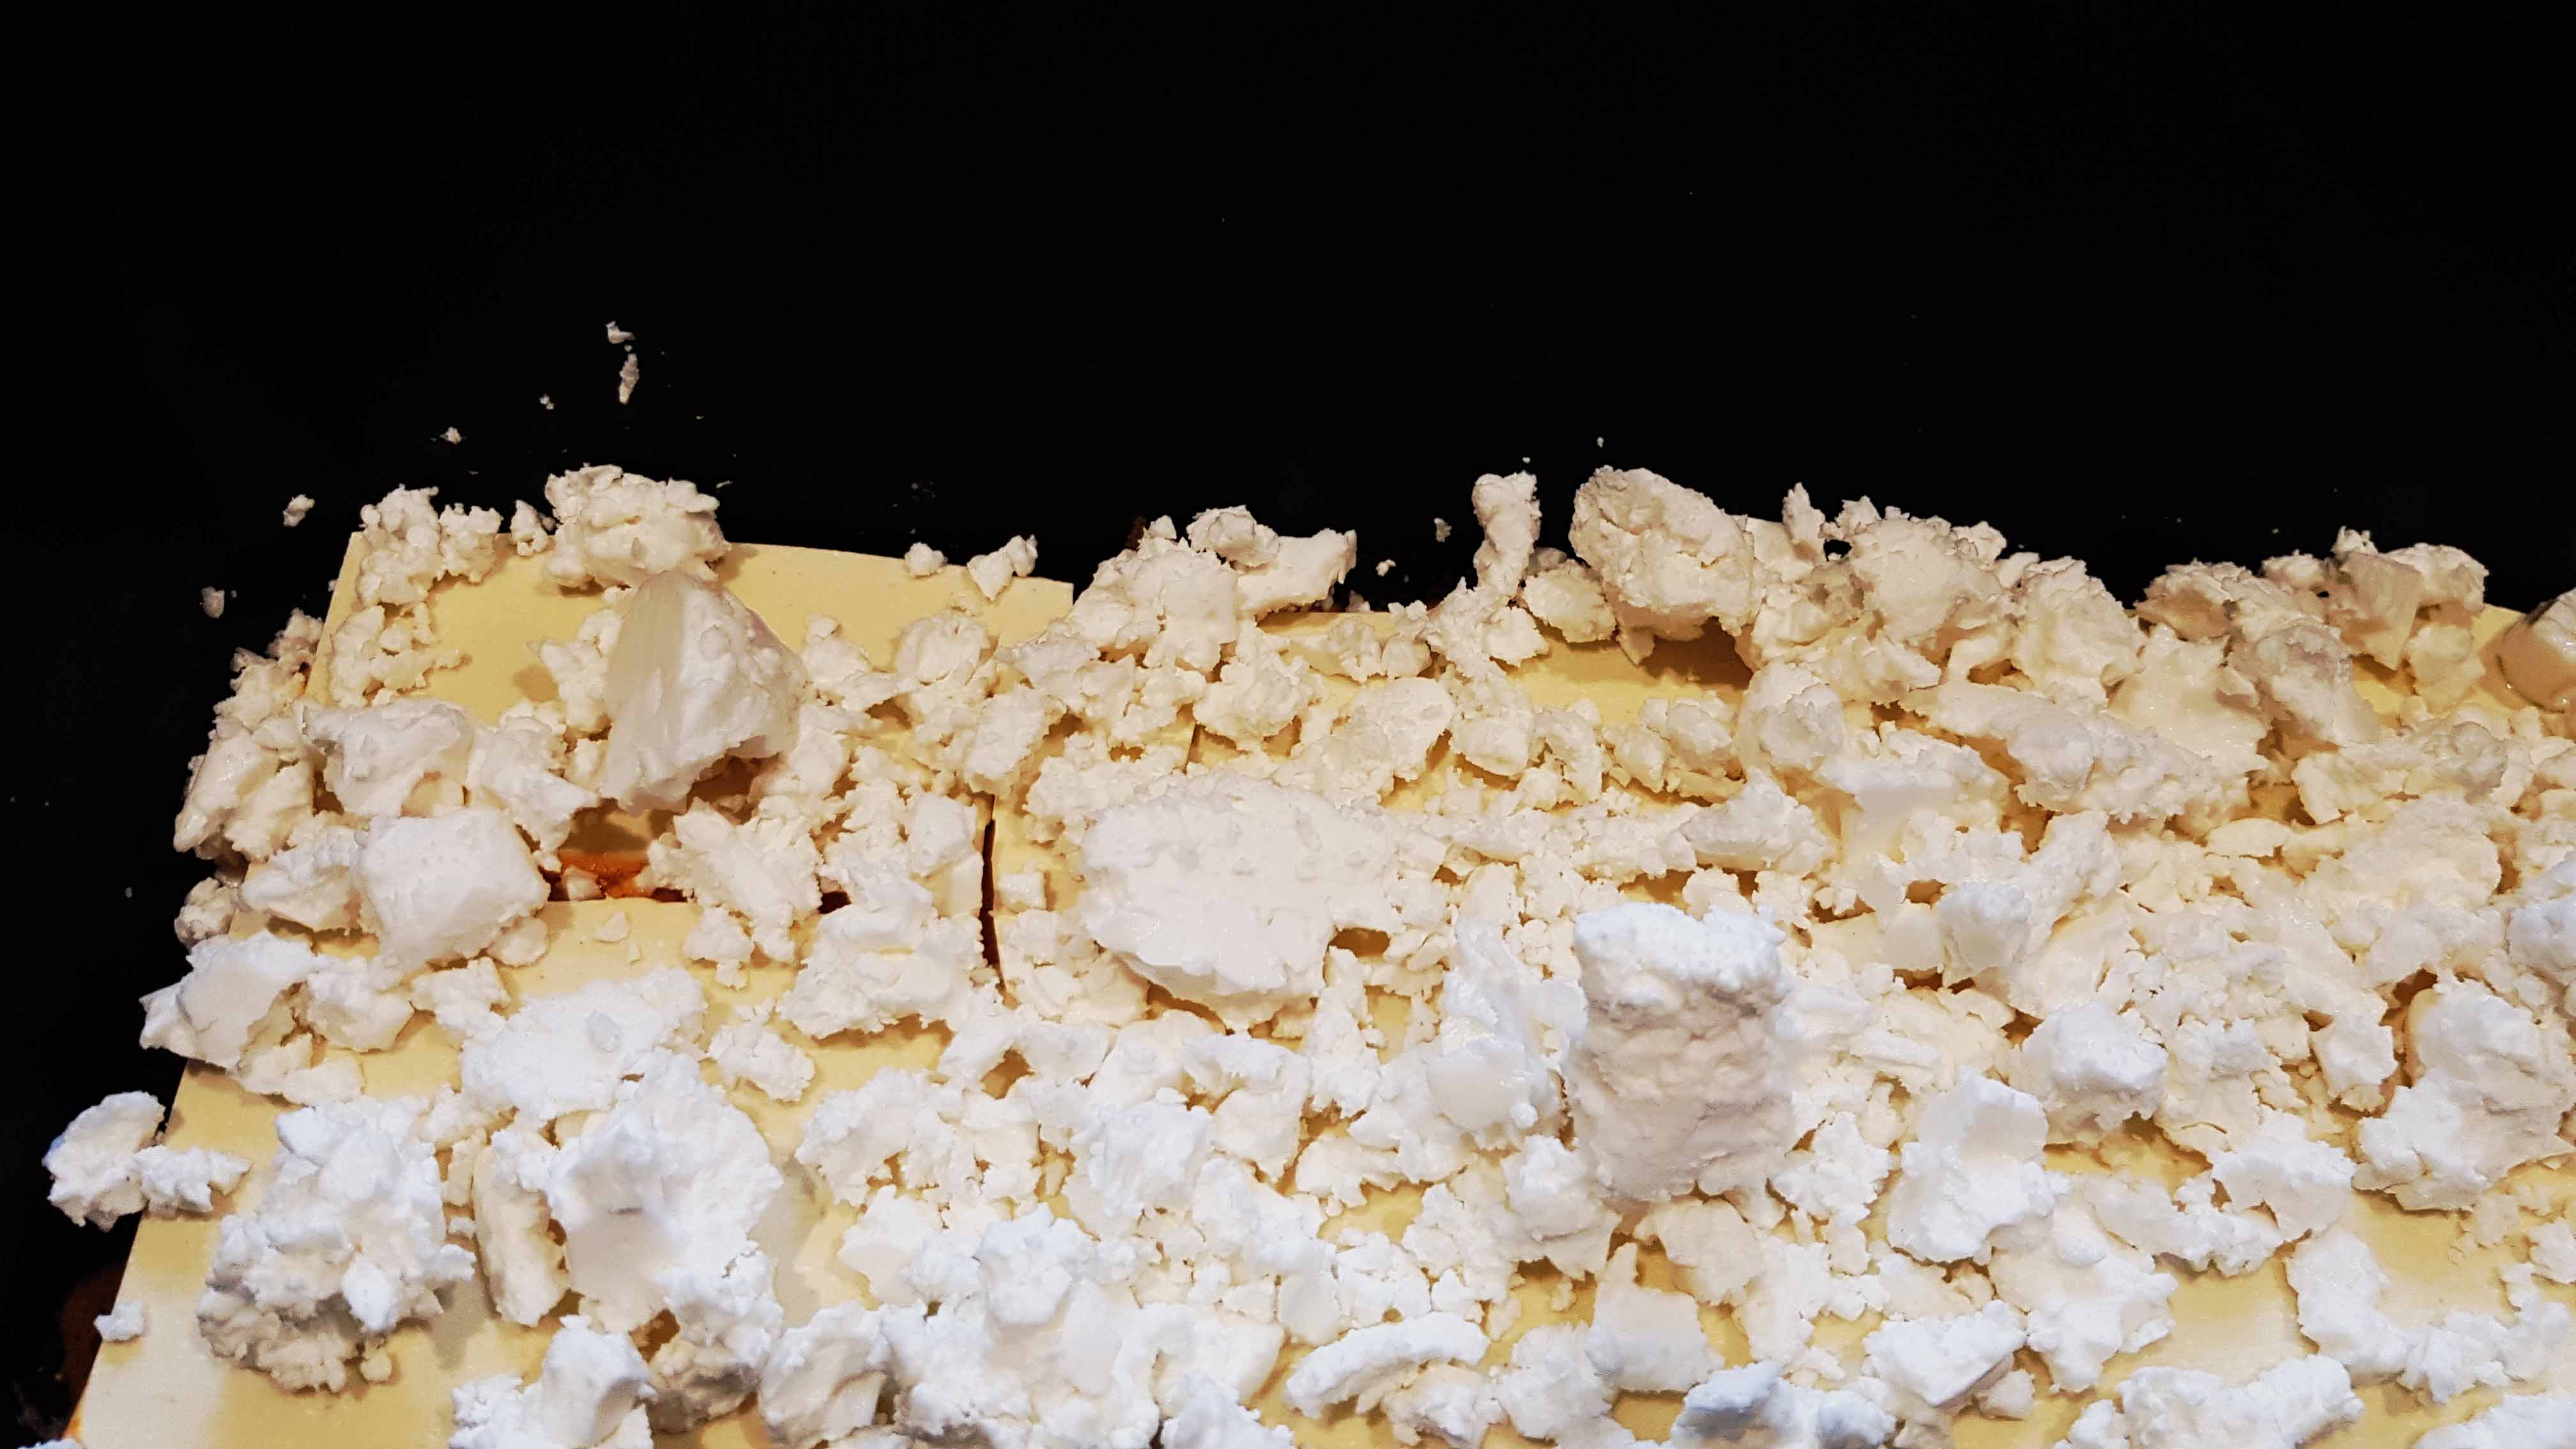
Xmas Cookies with Marzipan
This is my second favorite biscuit recipe and I bake these cuts for the second year in a row. The small appetizers are too delicious to resist! Juicy with the marzipan and chocolaty with the chocolate sprinkles. You will love them!
Ingredients Shortcrust pastry:
300g butter
3 eggs
3 egg yolks
220g icing sugar
550g flour
150g ground almonds
150g chocolate sprinkles
3 sachets vanilla sugar
Filling:
300g Marzipan paste
3 eggwhites
Glazing:
250g icing sugar
1 teaspoon cinnamon
3 tbsp rum
3 tbsp water
First prepare the shortcrust pastry and chill (at least 1 hour) in the fridge.
For the filling the marzipan is mixed with the egg whites to a homogeneous mass.
Divide the dough into 2 equal pieces.
Roll out the first half and place it on a baking tray lined with baking paper.
Spread the marzipan filling on it.
Roll out the second dough plate and place it on the first plate with the marzipan filling.
Prick with a fork and bake in a preheated oven at 160 degrees. (Do not bake too dark). Remove from oven.
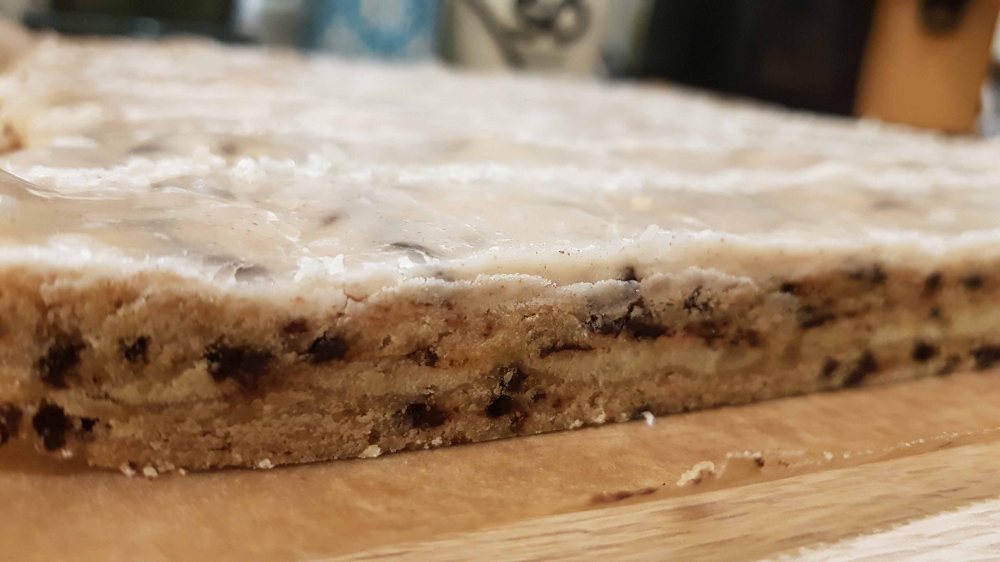
Make the glaze, spread over the hot pastry and let dry.
Leave to rest overnight and cut into pieces the next day.
I wish you a Merry Christmas!
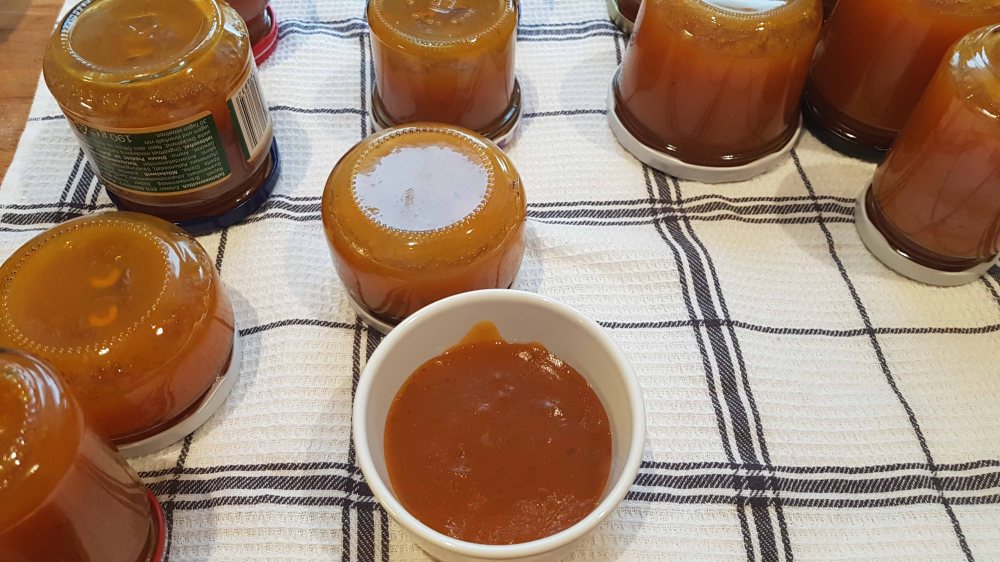
Fancy Apricot Jam
Booooooooooring!
Far from it! Apricot is also excitingly different!
Honestly? When my husband announced to bring apricots home, I immediately had a vision…….. muahahahahahaha, that sounds spooky!
But don’t you sometimes have that that you immediately have an idea and can assign the taste immediately? Nope? Well, then oute myself as FREAK.
Back to the apricots.
The apricots were beautifully ripe. A few had dark spots, but that didn’t bother much… you could cut them away.
I didn’t have time to take care of it immediately, so I pitted the apricots and froze them first.
Since patience is not my great strength (at least not if I have a goal in mind) I was almost annoyed not to be able to start right away.
Anyway, the rainy Saturday afternoon came and I took the apricots out of the freezer. I had already bought preserving sugar, everything else I had in the garden or in the spice drawer.
The apricots were put into the pot and I first thawed them over a low heat.
What was the plan?
There should be three different flavours:
Apricot with tonka bean
Apricot – sage
Apricot – rosemary
The essential oils of sage and rosemary I could imagine fantastic (see my vision) and tonka bean is anyway a guarantor for a great taste because of its vanilla-like aroma.
How does the taste get into the apricots?
I briefly boiled the thawed apricots, mashed them and passed them through a sieve, what was not my plan.
I had to put everything through the sieve because I´ve forgotten one damn pit……the hand blender made some strange noise……and the result was not to have a rustic jam…..I had to put it through a sieve.
From the fruit puree I took three portions and balanced them, because of the amount of jam sugar needed.
To flavor the puree I used
1. the sage chopped into small pieces and then pureed with the fruit mixture
2. the rosemary plucked from the stems
3. tonka bean (BIO quality from spicebar) grated

Add the herbs / tonka bean to the apricot mixture, bring to boil briefly and leave to steep for an hour (or longer).
With the rosemary variant, then fish out the needles, which become so squashy through cooking. I have plucked small rosemary bouquets for the glasses and put them into the glasses before the hot mass is filled in.
I don’t have to mention that the glasses and lids should be sterile, do I? I rinsed the glasses hot and sterilized them in the oven. The lids cooked in a pot with water.
So, the 3 kinds of jam were covered with jam sugar and cooked according to the package instructions and filled into the sterilized glasses, immediately closed and left to cool upside down.
Now you ask yourselves, how do I know whether enough „aroma“ has reached the Marmelade? Well, I really don’t have any quantities for you, because that’s really a matter of taste. After the steep you can try with the spoon whether the desired flavour pleases. I recommend to refill rather than to overdose the herbs.

The first taste test was the sage variant.
The sage taste good. It is a delicate nuance that is sensationally delicious.
The jam tastes just as good on a breakfast roll as it does with a spicy cheese!
So we love it! We are already curious about the other varieties!
Veal Ossobuco (veal shanks braised) out of the Dutch Oven
This a really but delicious easy dish
The most elaborate part of the dish is the slicing of the vegetables. Otherwise you have to do little
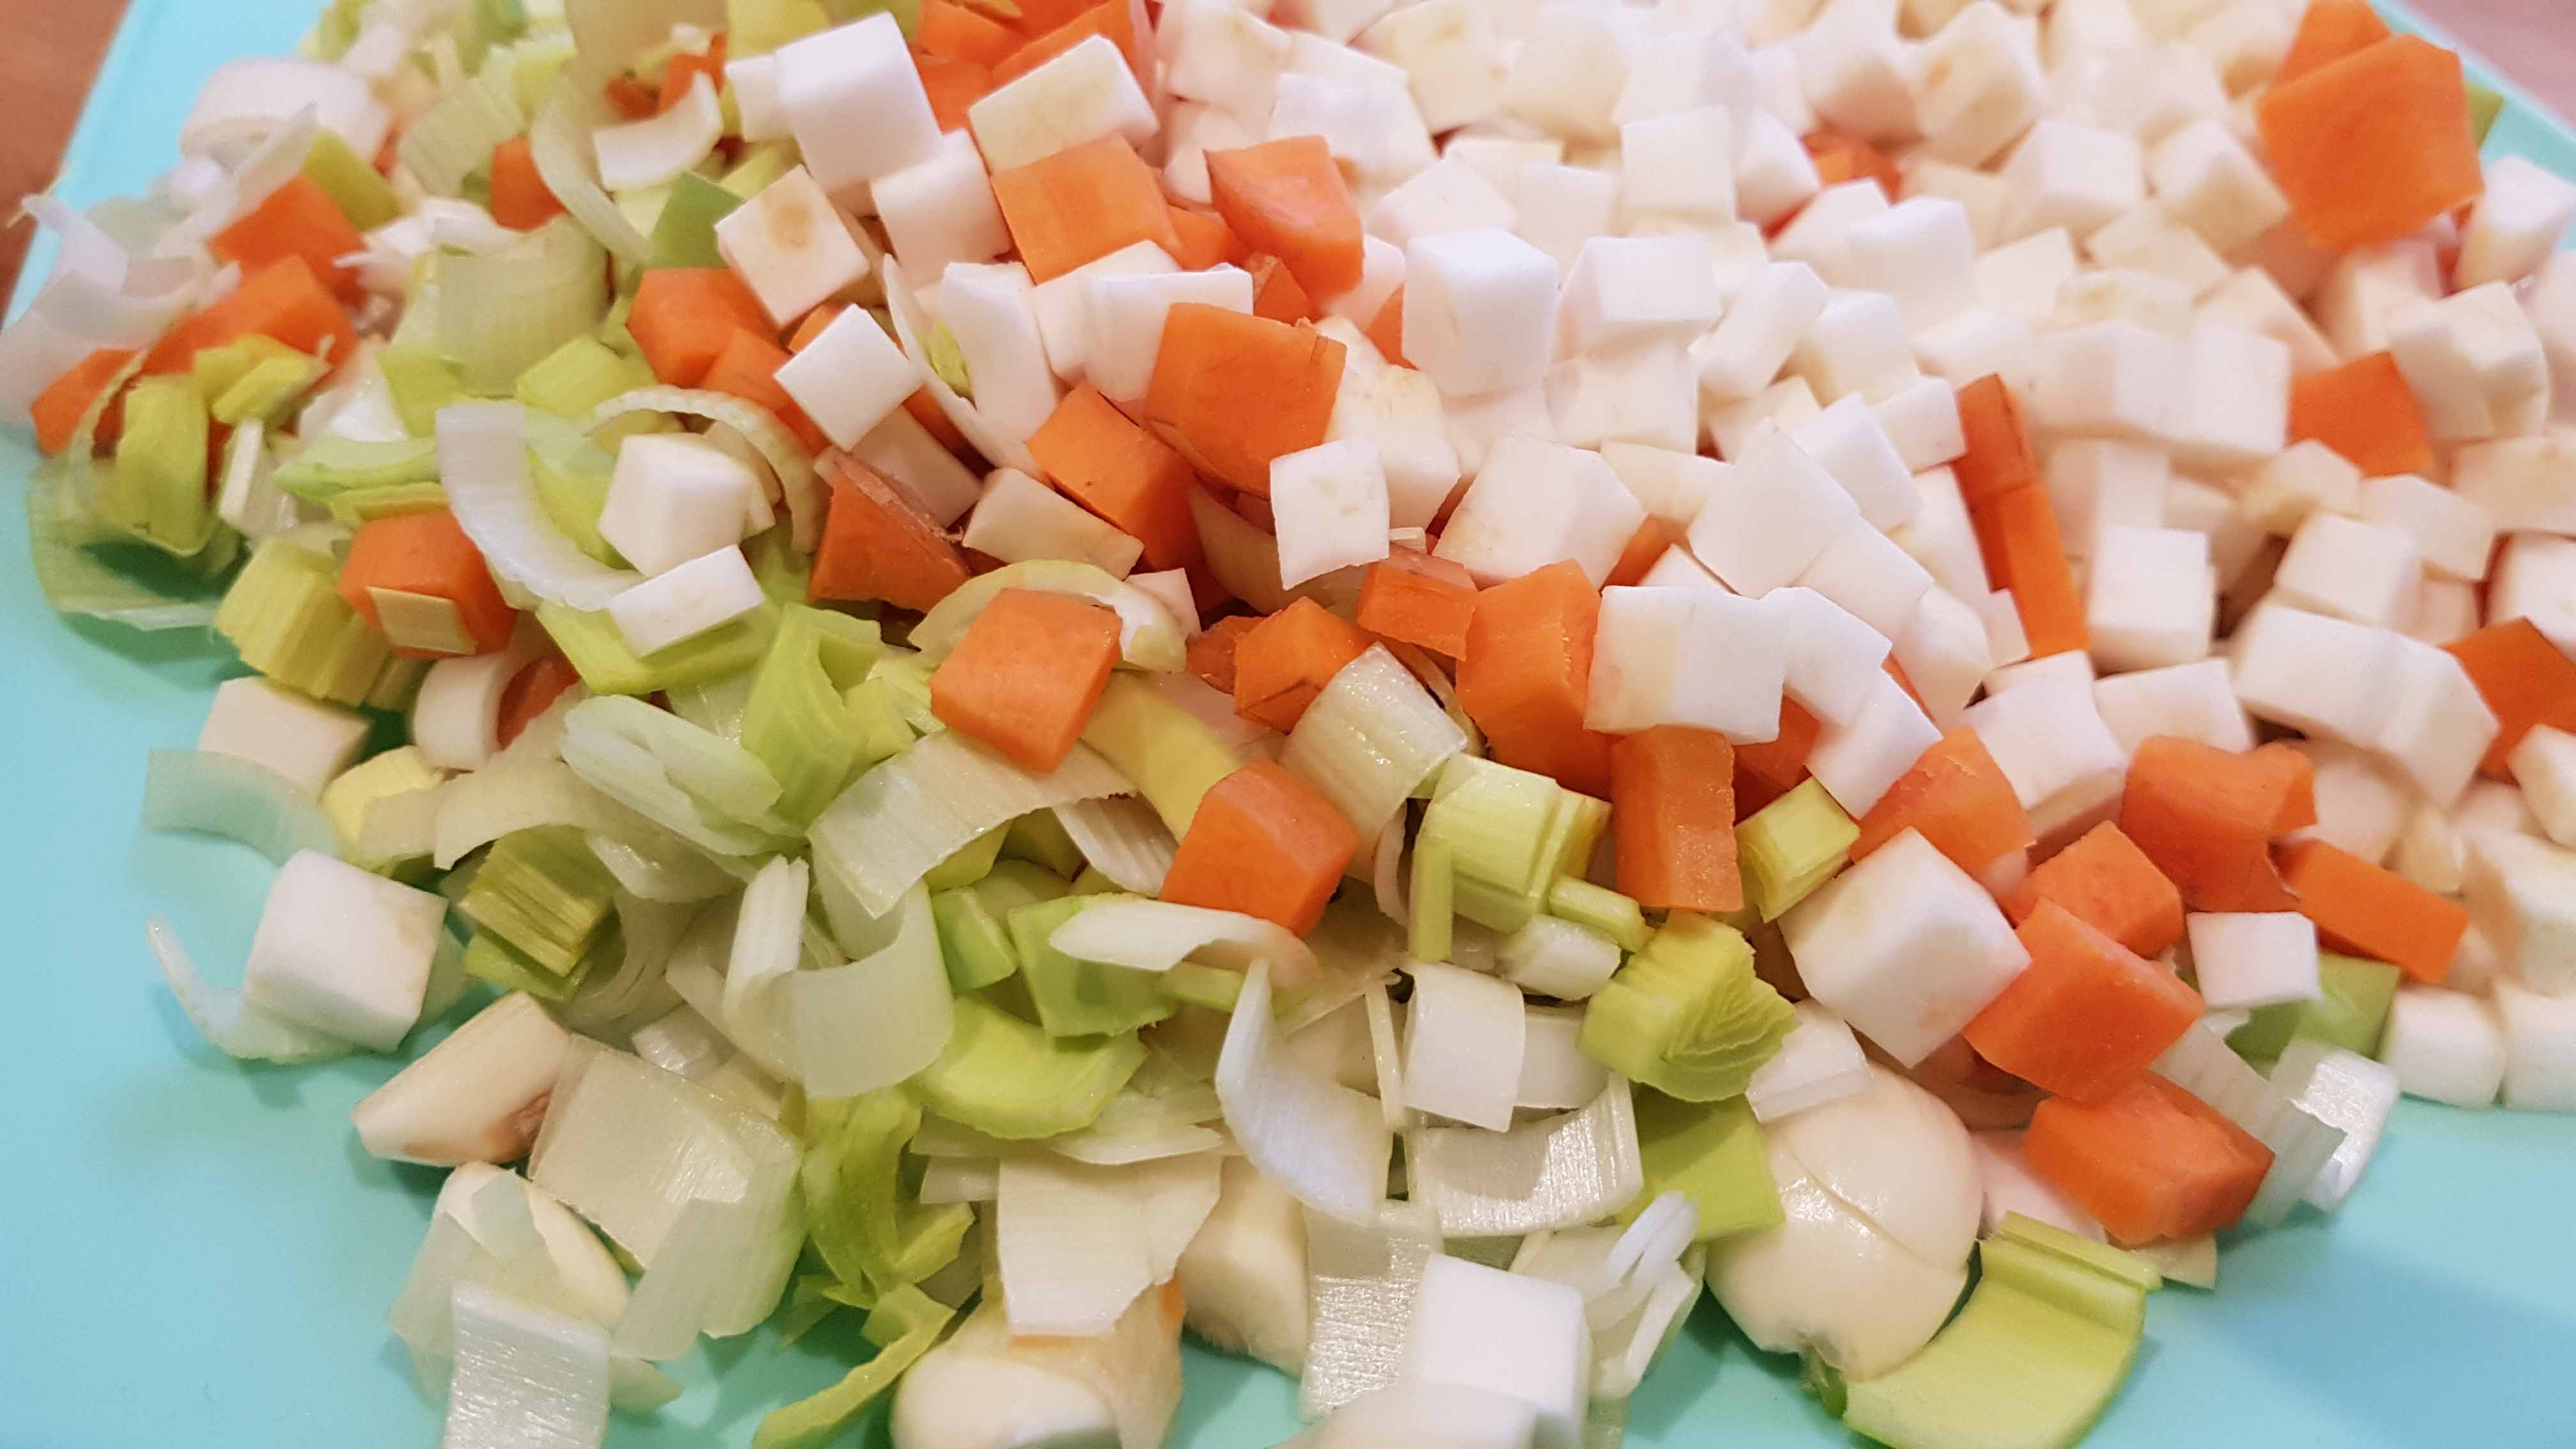
Ingredients: (serves 2)
* celery (1/4)
* carrots (2)
* leek (1 Stange)
* rosemary (1 small branch)
* garlic ( 3 cloves)
* oil
* tomatoe puree (1 tablespoon)
* vegetable broth (2 jars)
* redwine (3/4 bottle)
* salt and pepper
* 2x veal ossobuco

Cut the celery and carrots into small cubes, the leek into very fine rings. This takes the longest.
Prepare the charcoal starter. I used 20 KOKOKO eggs from McBrikett. In these adverse weather conditions you need reliable coals that don’t run out in the slightest draft!
Quality pays off!
The annealing took about 25-30min.
Put 10 coals under the pot, heat the oil and fry the Ossobuco with the rosemary on both sides and then put aside.
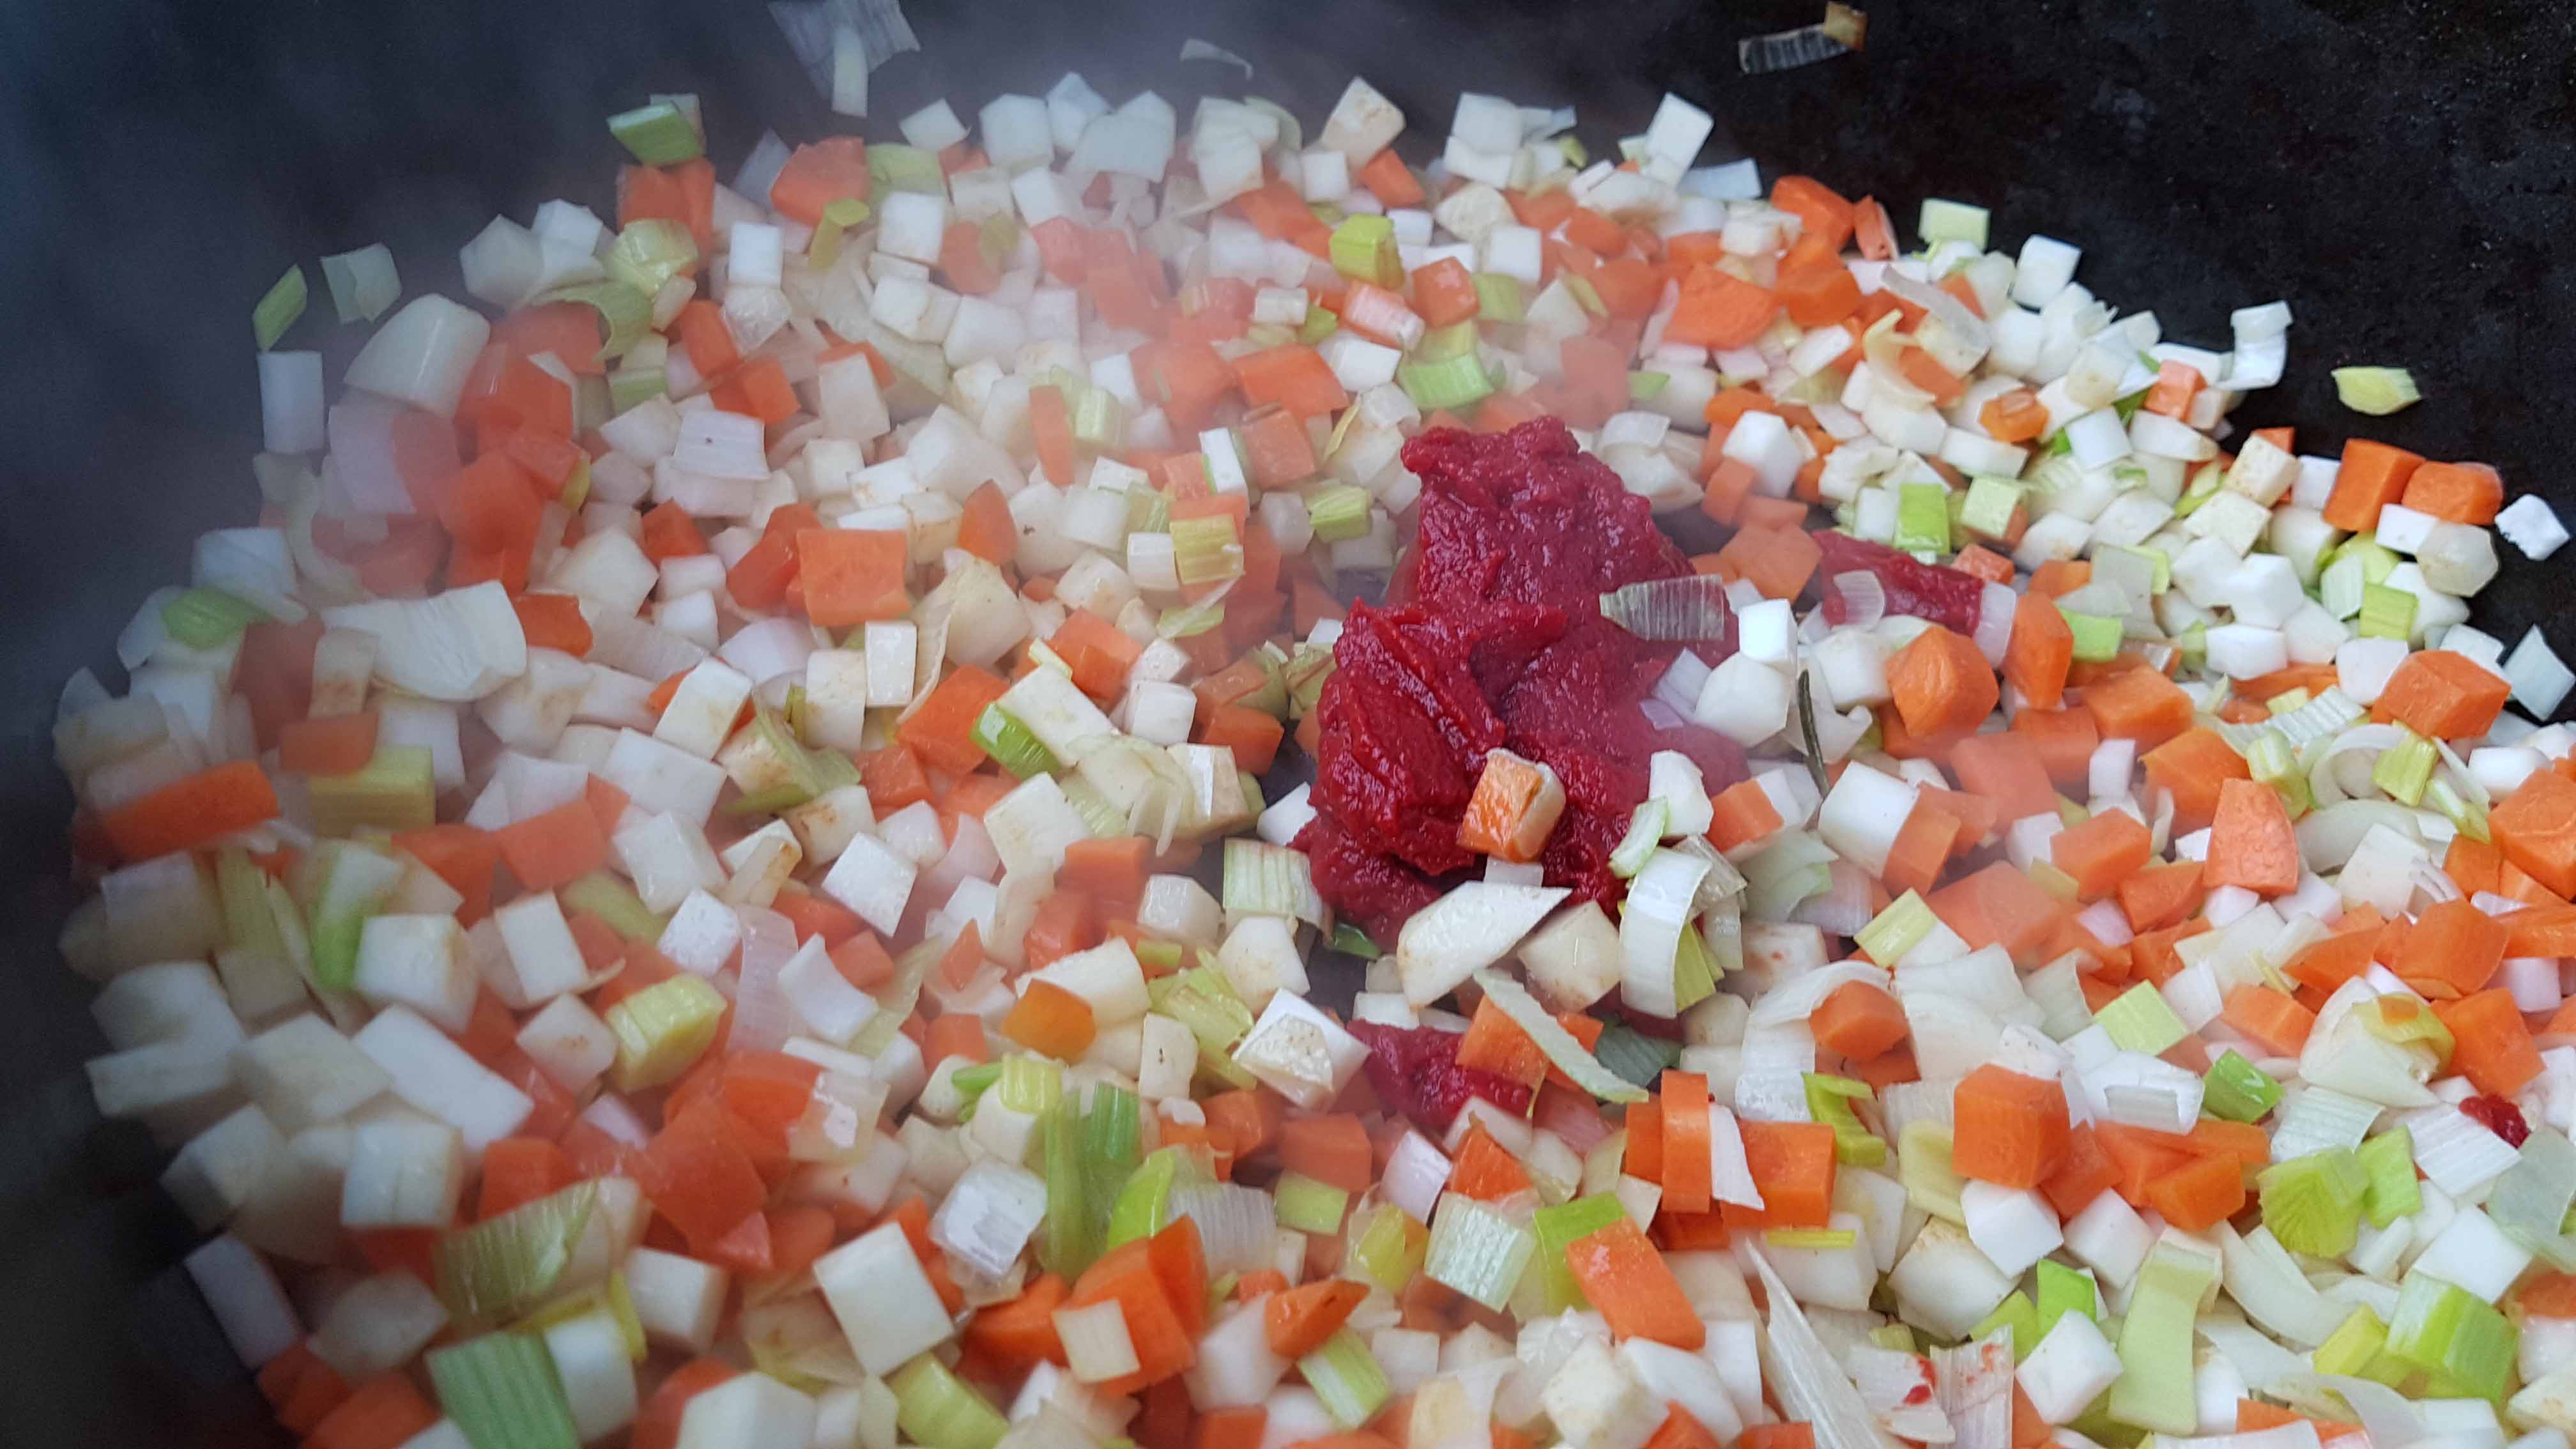

Then sauté the vegetables. Roast 1 tablespoon tomato paste with and then deglaze with a glass of broth and a dash of red wine.

Put the meat in and close the Dutch Oven. Place the remaining coals on top and wait.

Check in between if there is enough liquid in the Dutch Oven. If necessary, add more broth and red wine.
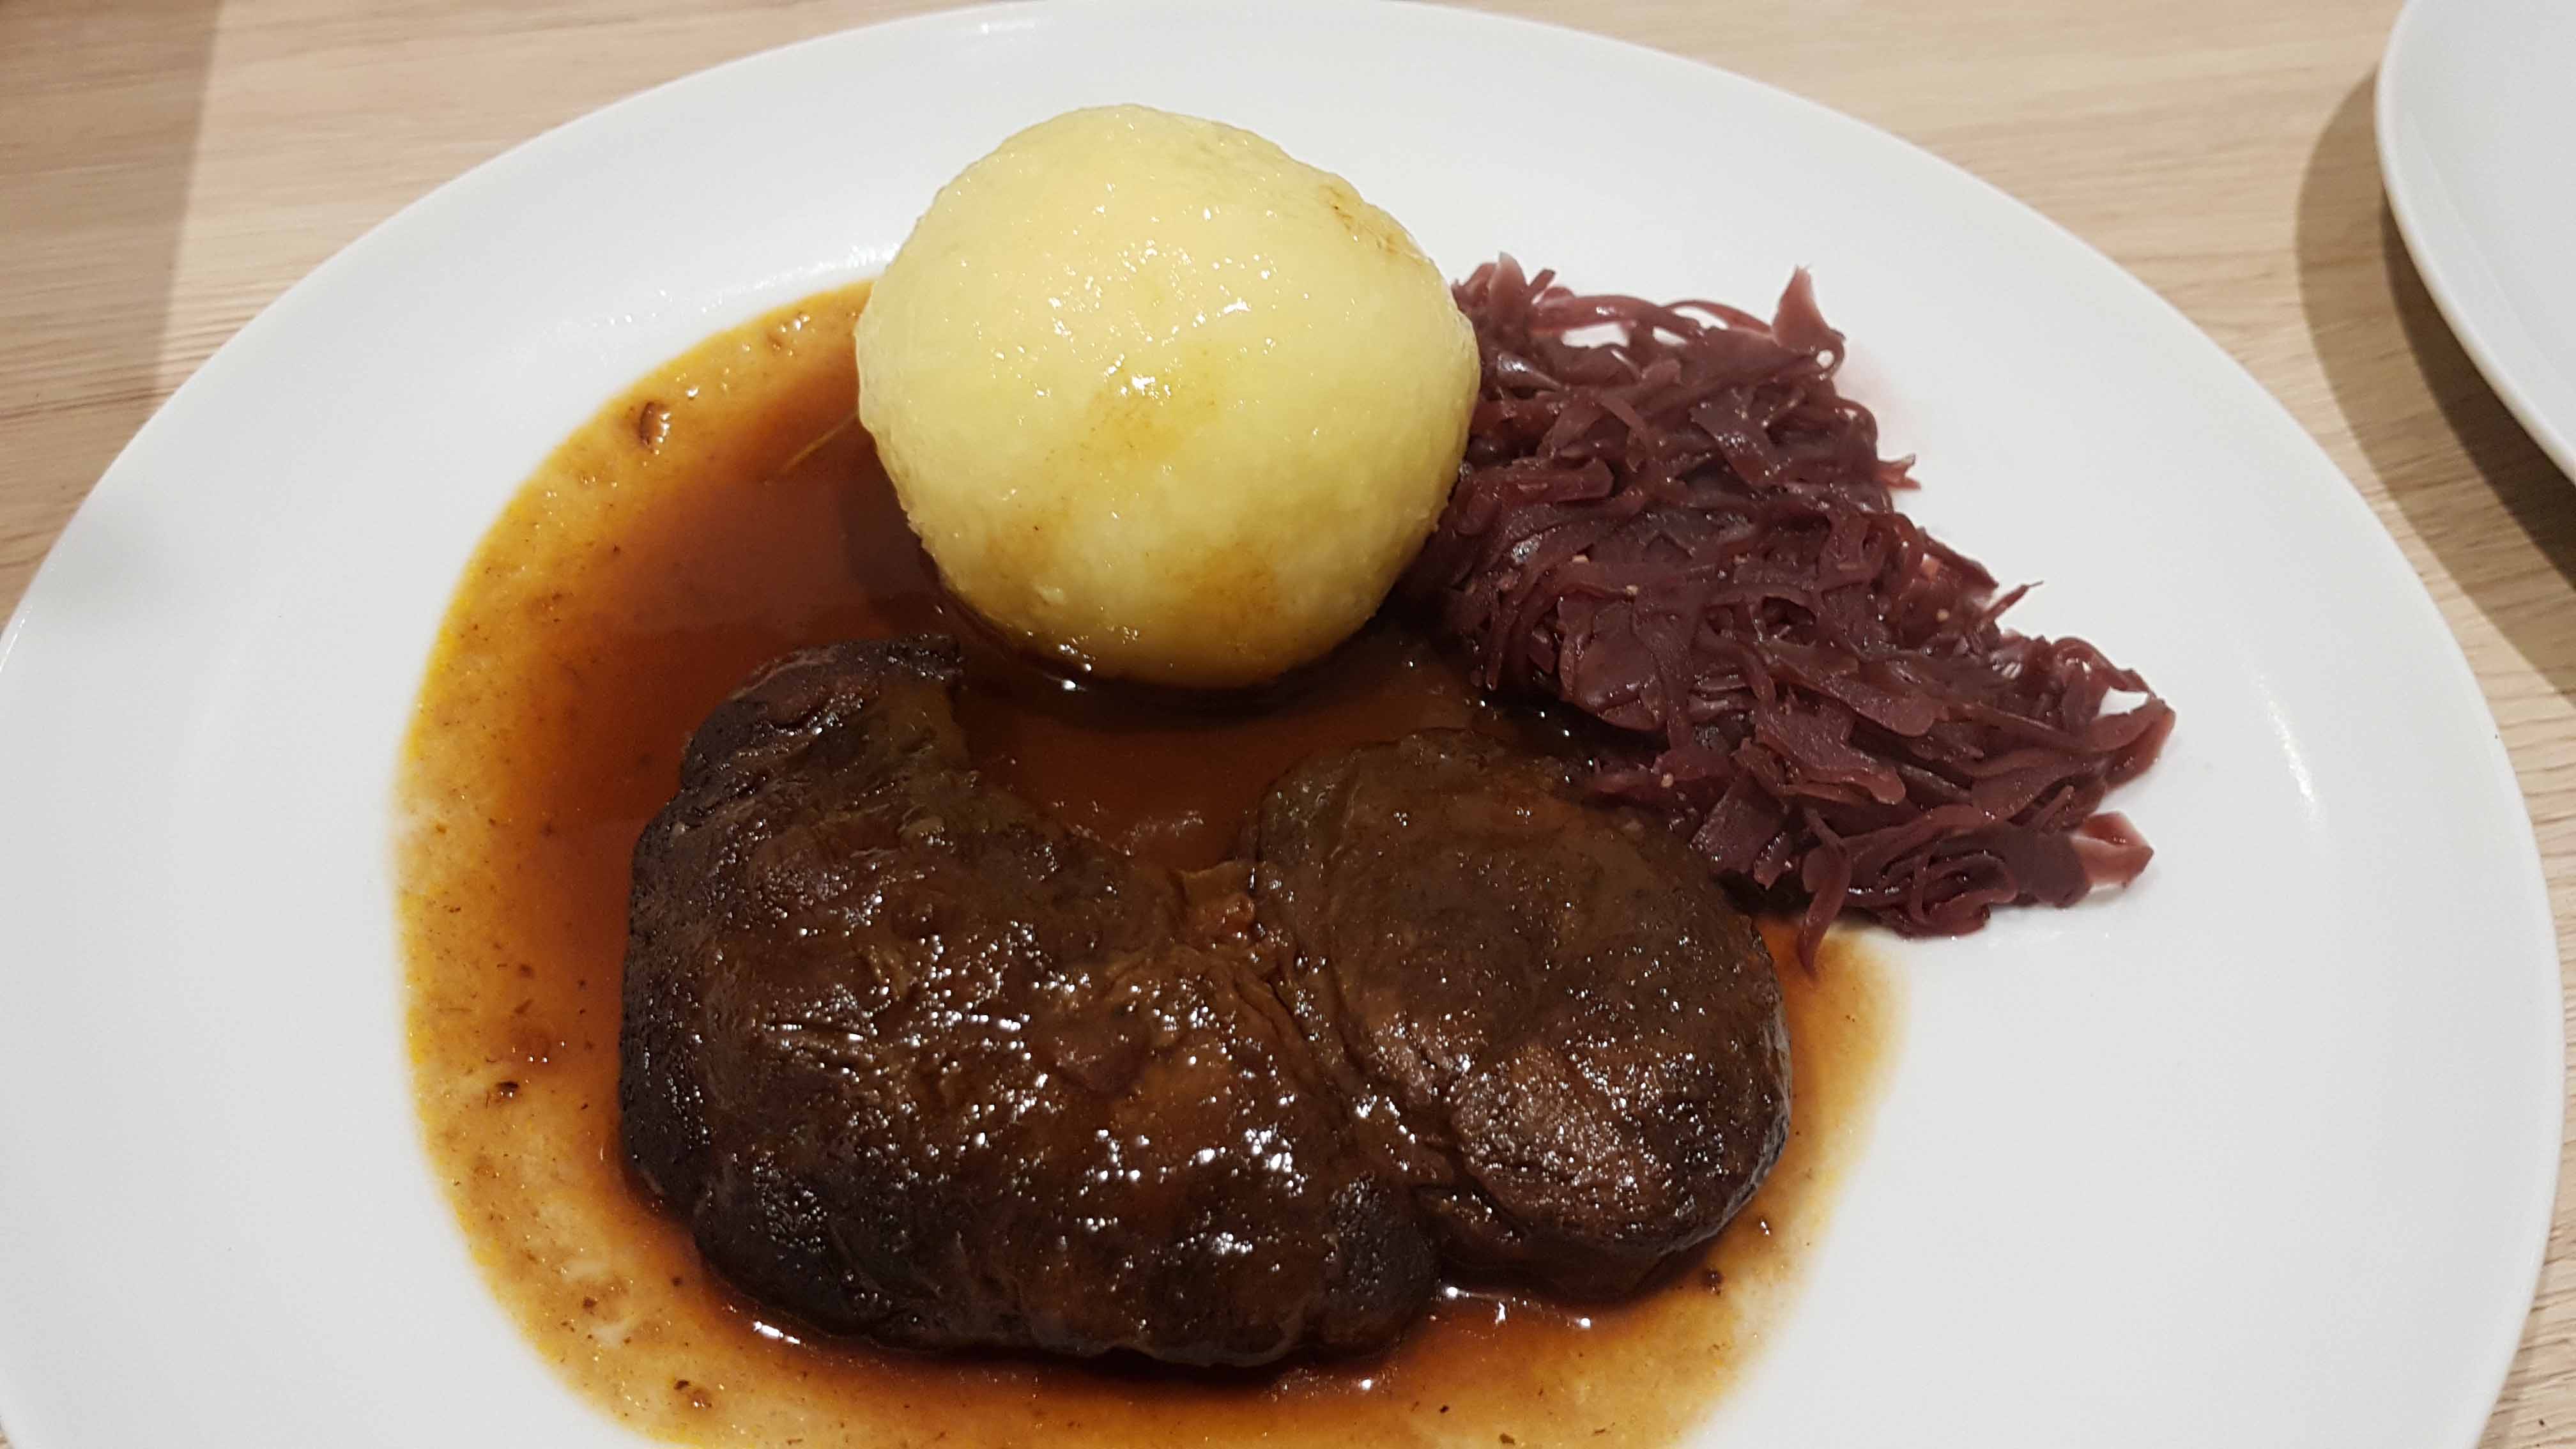
After 2 hours the leg slices were ready.
Remove the meat from the sauce and put the sauce through a sieve.

The sauce didn’t have to be seasoned anymore, I just added a piece of butter. It was just WOW!
As a side dish we had dumplings and red cabbage. I admit that I used a finished product for the red cabbage and I think it is ok.
Lemoncurd or Cinnamon Knots
Ingredients for the base dough:
* 500g flour
* 3/4 cube yeast (or dry yeast)
* 300ml milk (lukewarm)
* 1 egg
* 70g sugar
* 1 pinch od salt
* 40g softened butter
Lemoncurd filling:
* 125g butter
* 2 Tsp Lemon Curd
* dried Lemons, chopped
Cinnamon filling:
* 125g softened butter
* 60g walnuts, grounded
* 2 EL almonds, grounded
* 50g sugar
* 2 1/2 tsp cinnamon
Mixx the ingredients together and set aside.
Dissolve the yeast in lukewarm milk (note temperature, it should be below 30 degrees, otherwise the yeast is unuseable). Put all other ingredients in a bowl and knead firmly.
In my case this is done by my kitchen aid. It takes about 10 minutes. The dough is wonderfully soft and elastic.
Allow the dough to rest andrise covered for 60min.
Roll out the dough to a rectangle on a floured surface and spread the filling over the whole surface. Then fold in half into a rectangular shape….. now you can cut even stripes. The cutting of the approx. 1.5 cm wide stripes was done with the pizza cutter.
Now take the stripe, twist it, wrap it 1-2x around your index and middle finger and push the end through the hole……
Now let it rise for another 15 minutes, spread it with the egg and put it in the oven at 200-220 degrees for 8 to 10 minutes.
Glaze before baking
* 1 egg (stirred)
* sugar crystal or brown sugar (only if you like)
Glaze after baking
* 1/2 cup sugar
* 1/2 cup water
Dissolve the sugar in the water and bring to boil. Let cool down a bit
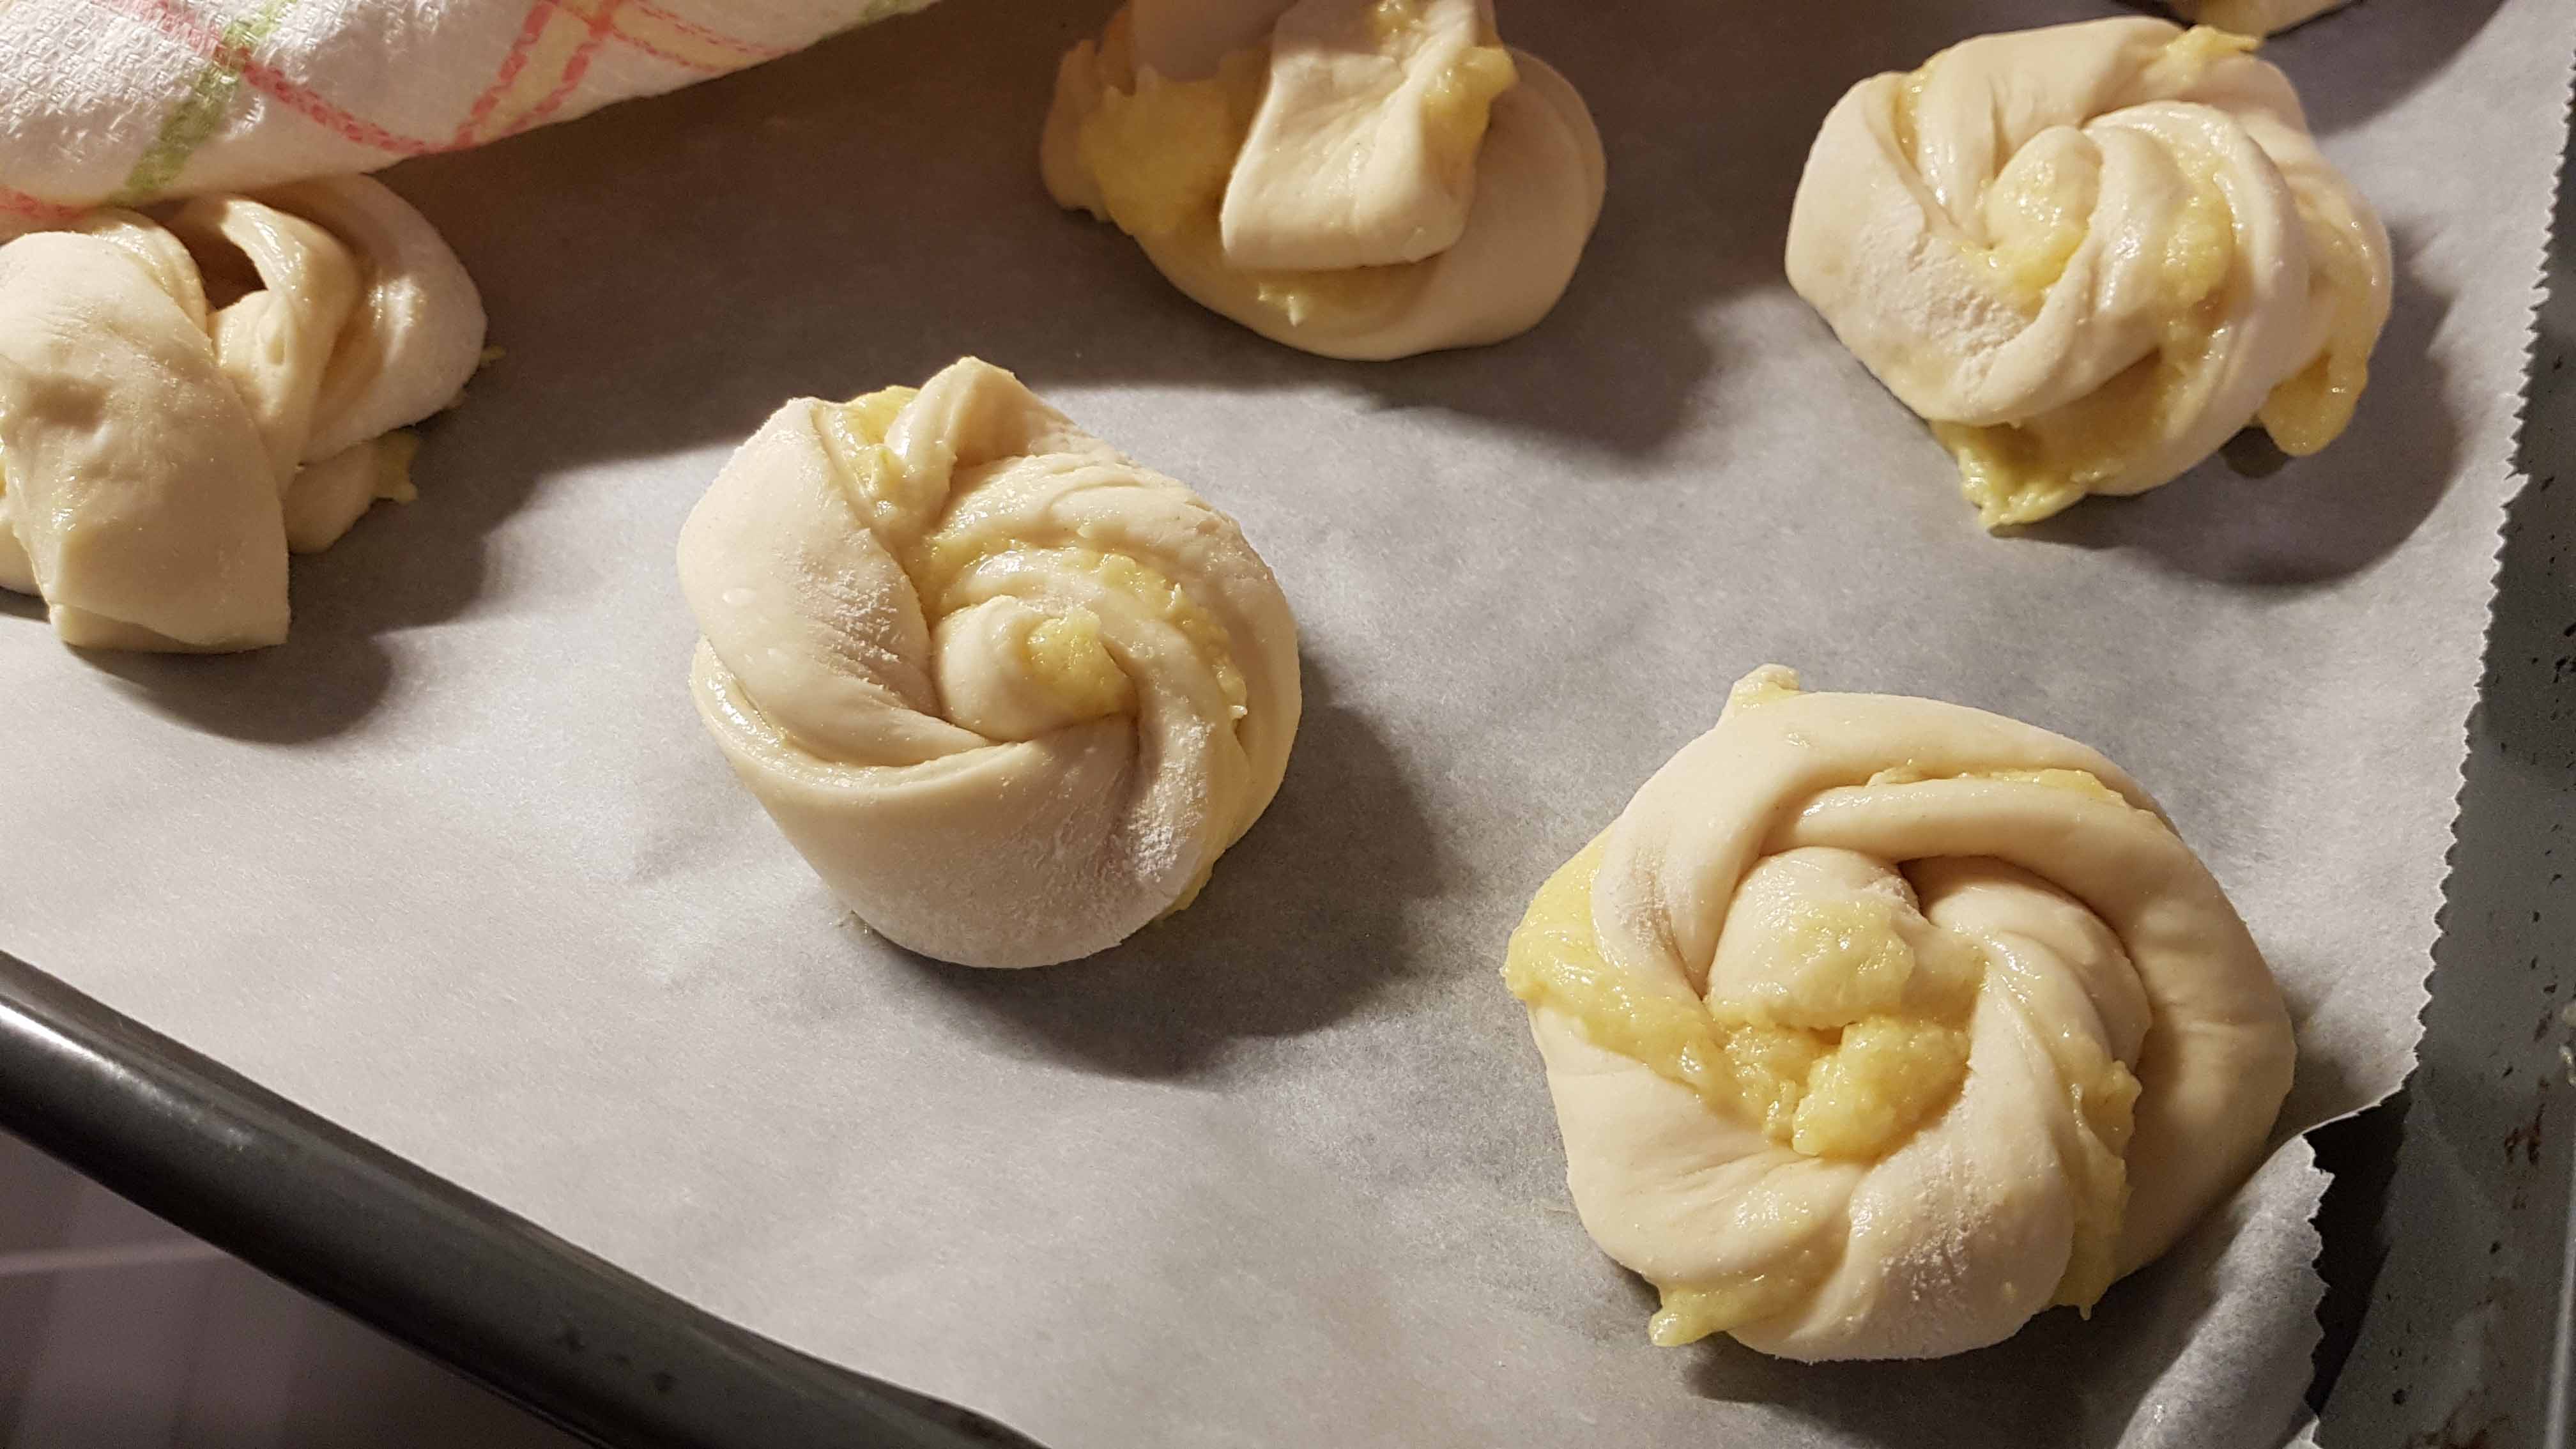

After baking, when the knots have a golden brown colour and they are still hot apply the sugar/water glaze for a nice an shiny looking.
The knots are perfect to freeze and store them.
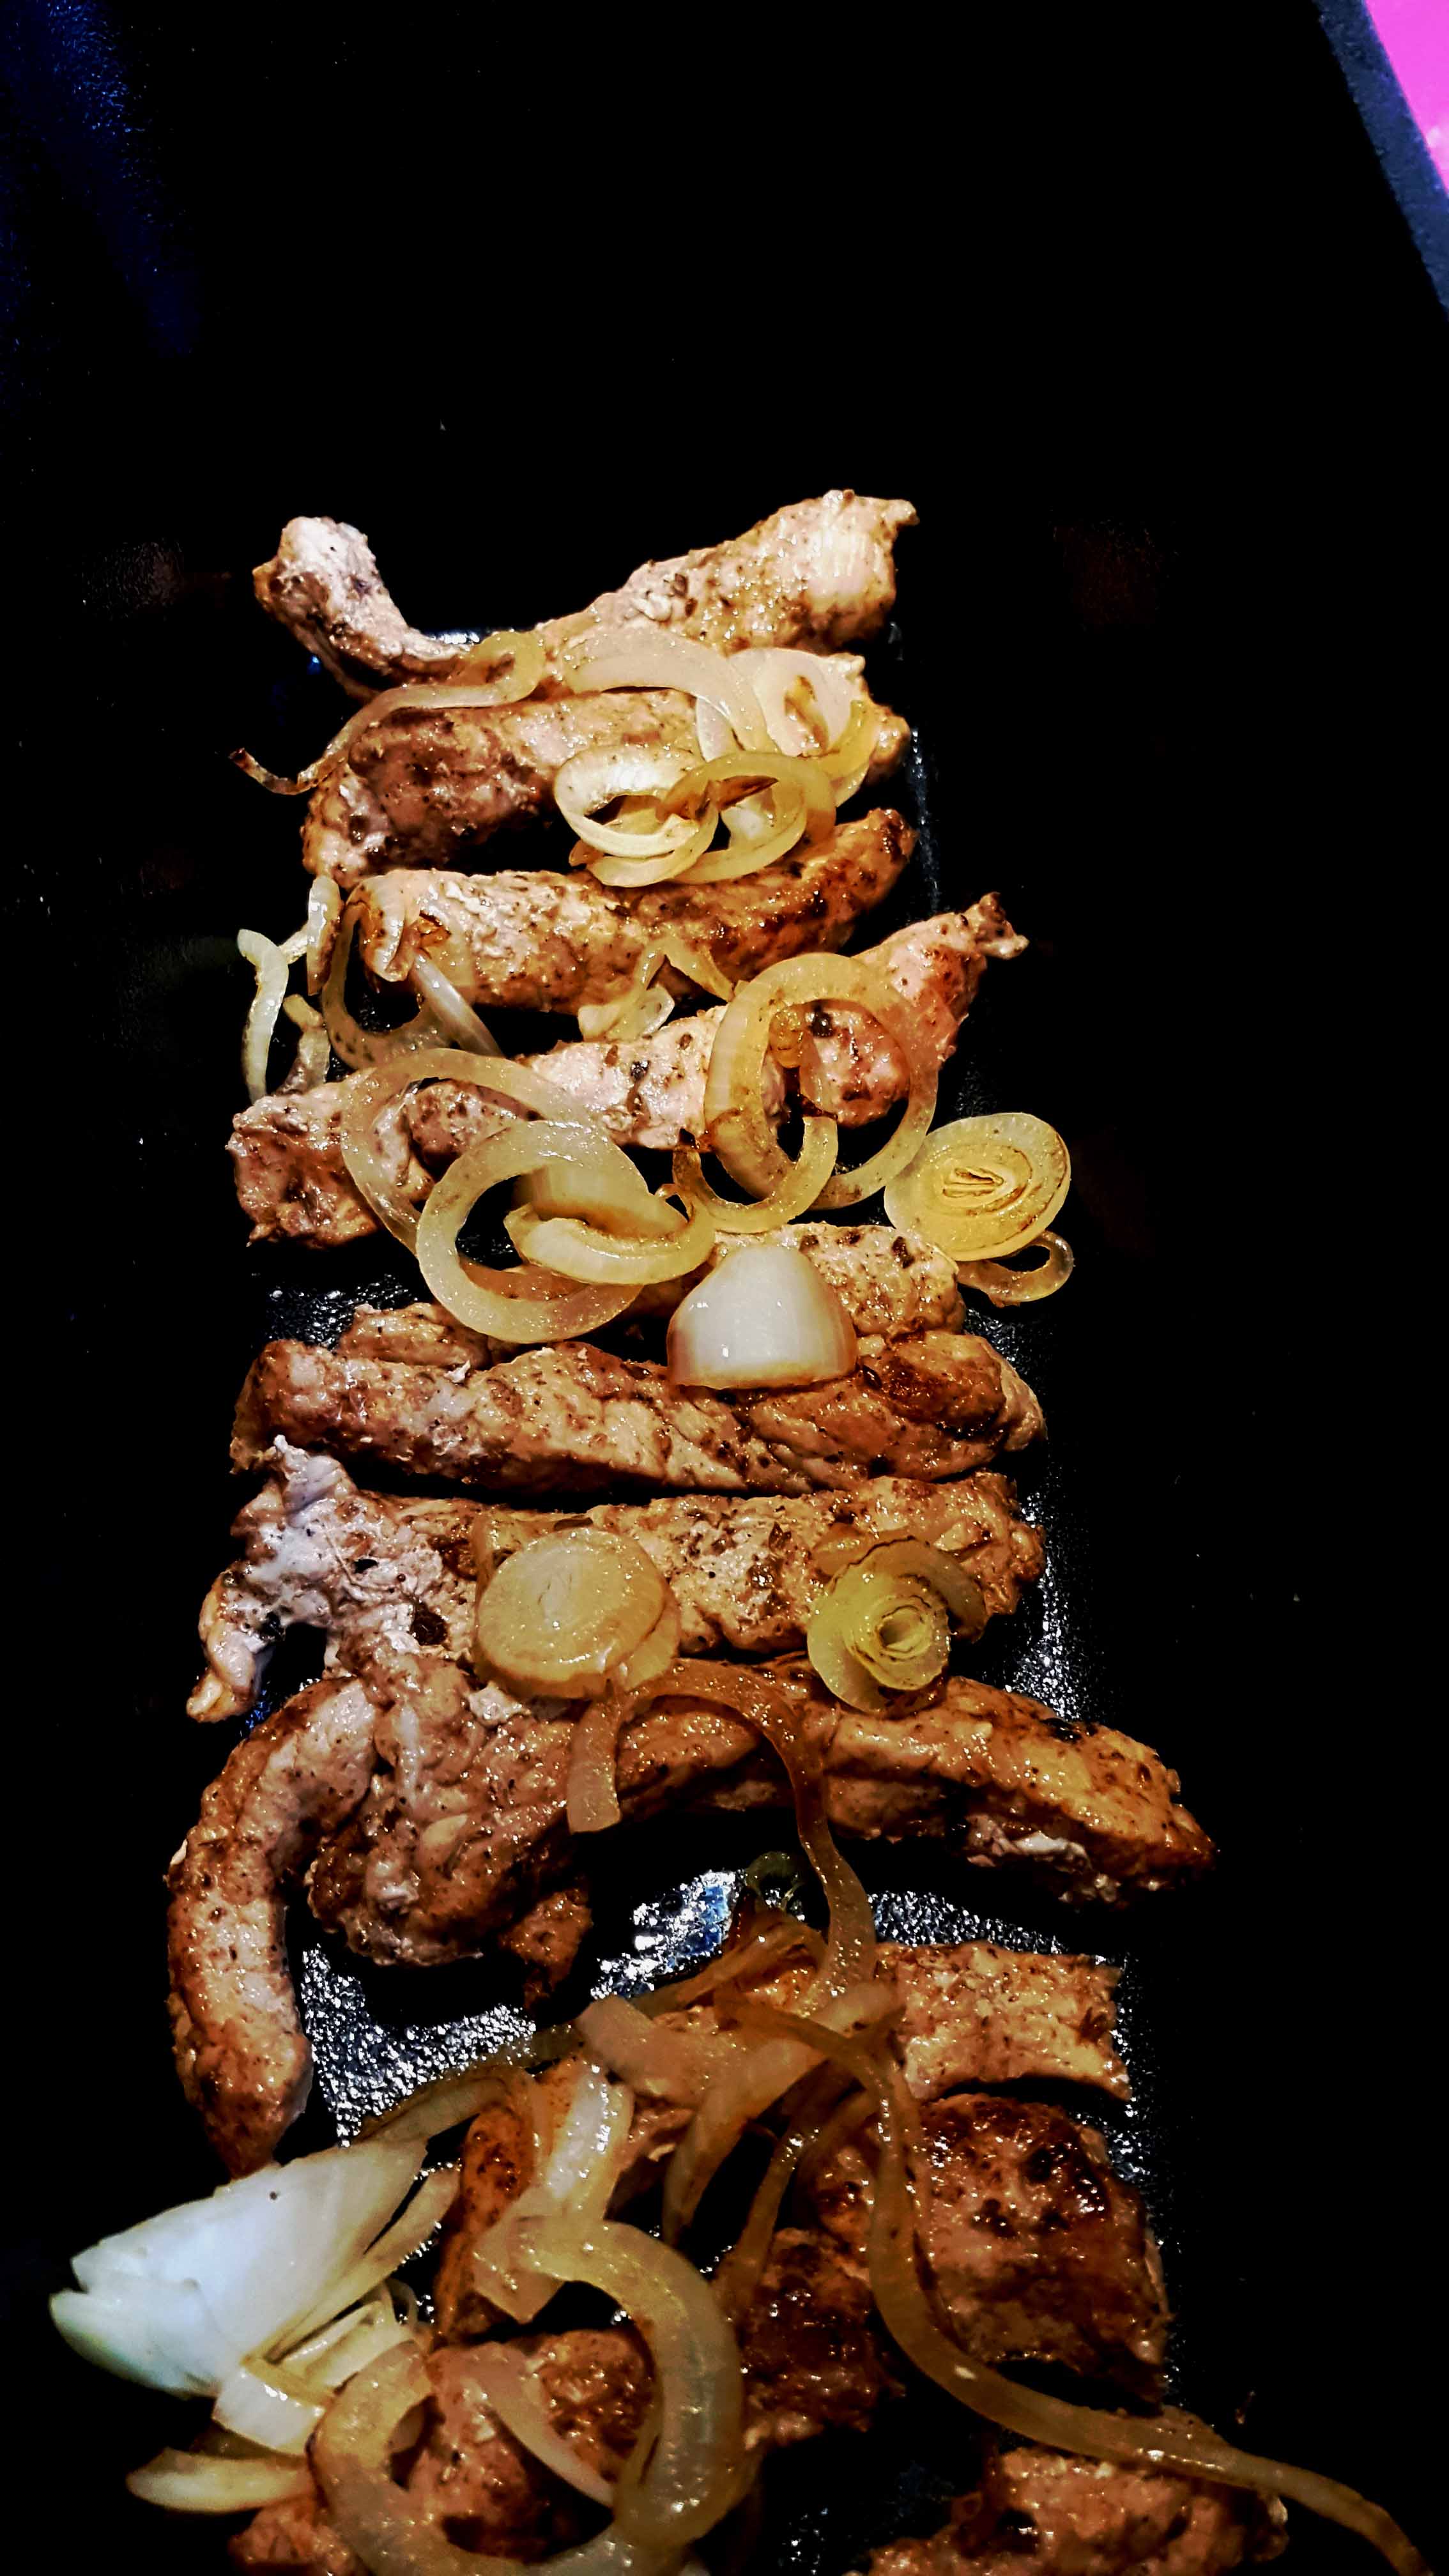
Gyros – Lasagna
{contains unsolicited advertising}
This lasagna combines everything I really like: gyros, metaxa sauce and noodles.
Also the beautiful cast iron mould K4 from Petromax is used. I’m in the mood for the Kamado.
The amount in this cast iron form is enough for 2-3 hungry eaters when it is filled to the top.

Ingridients:
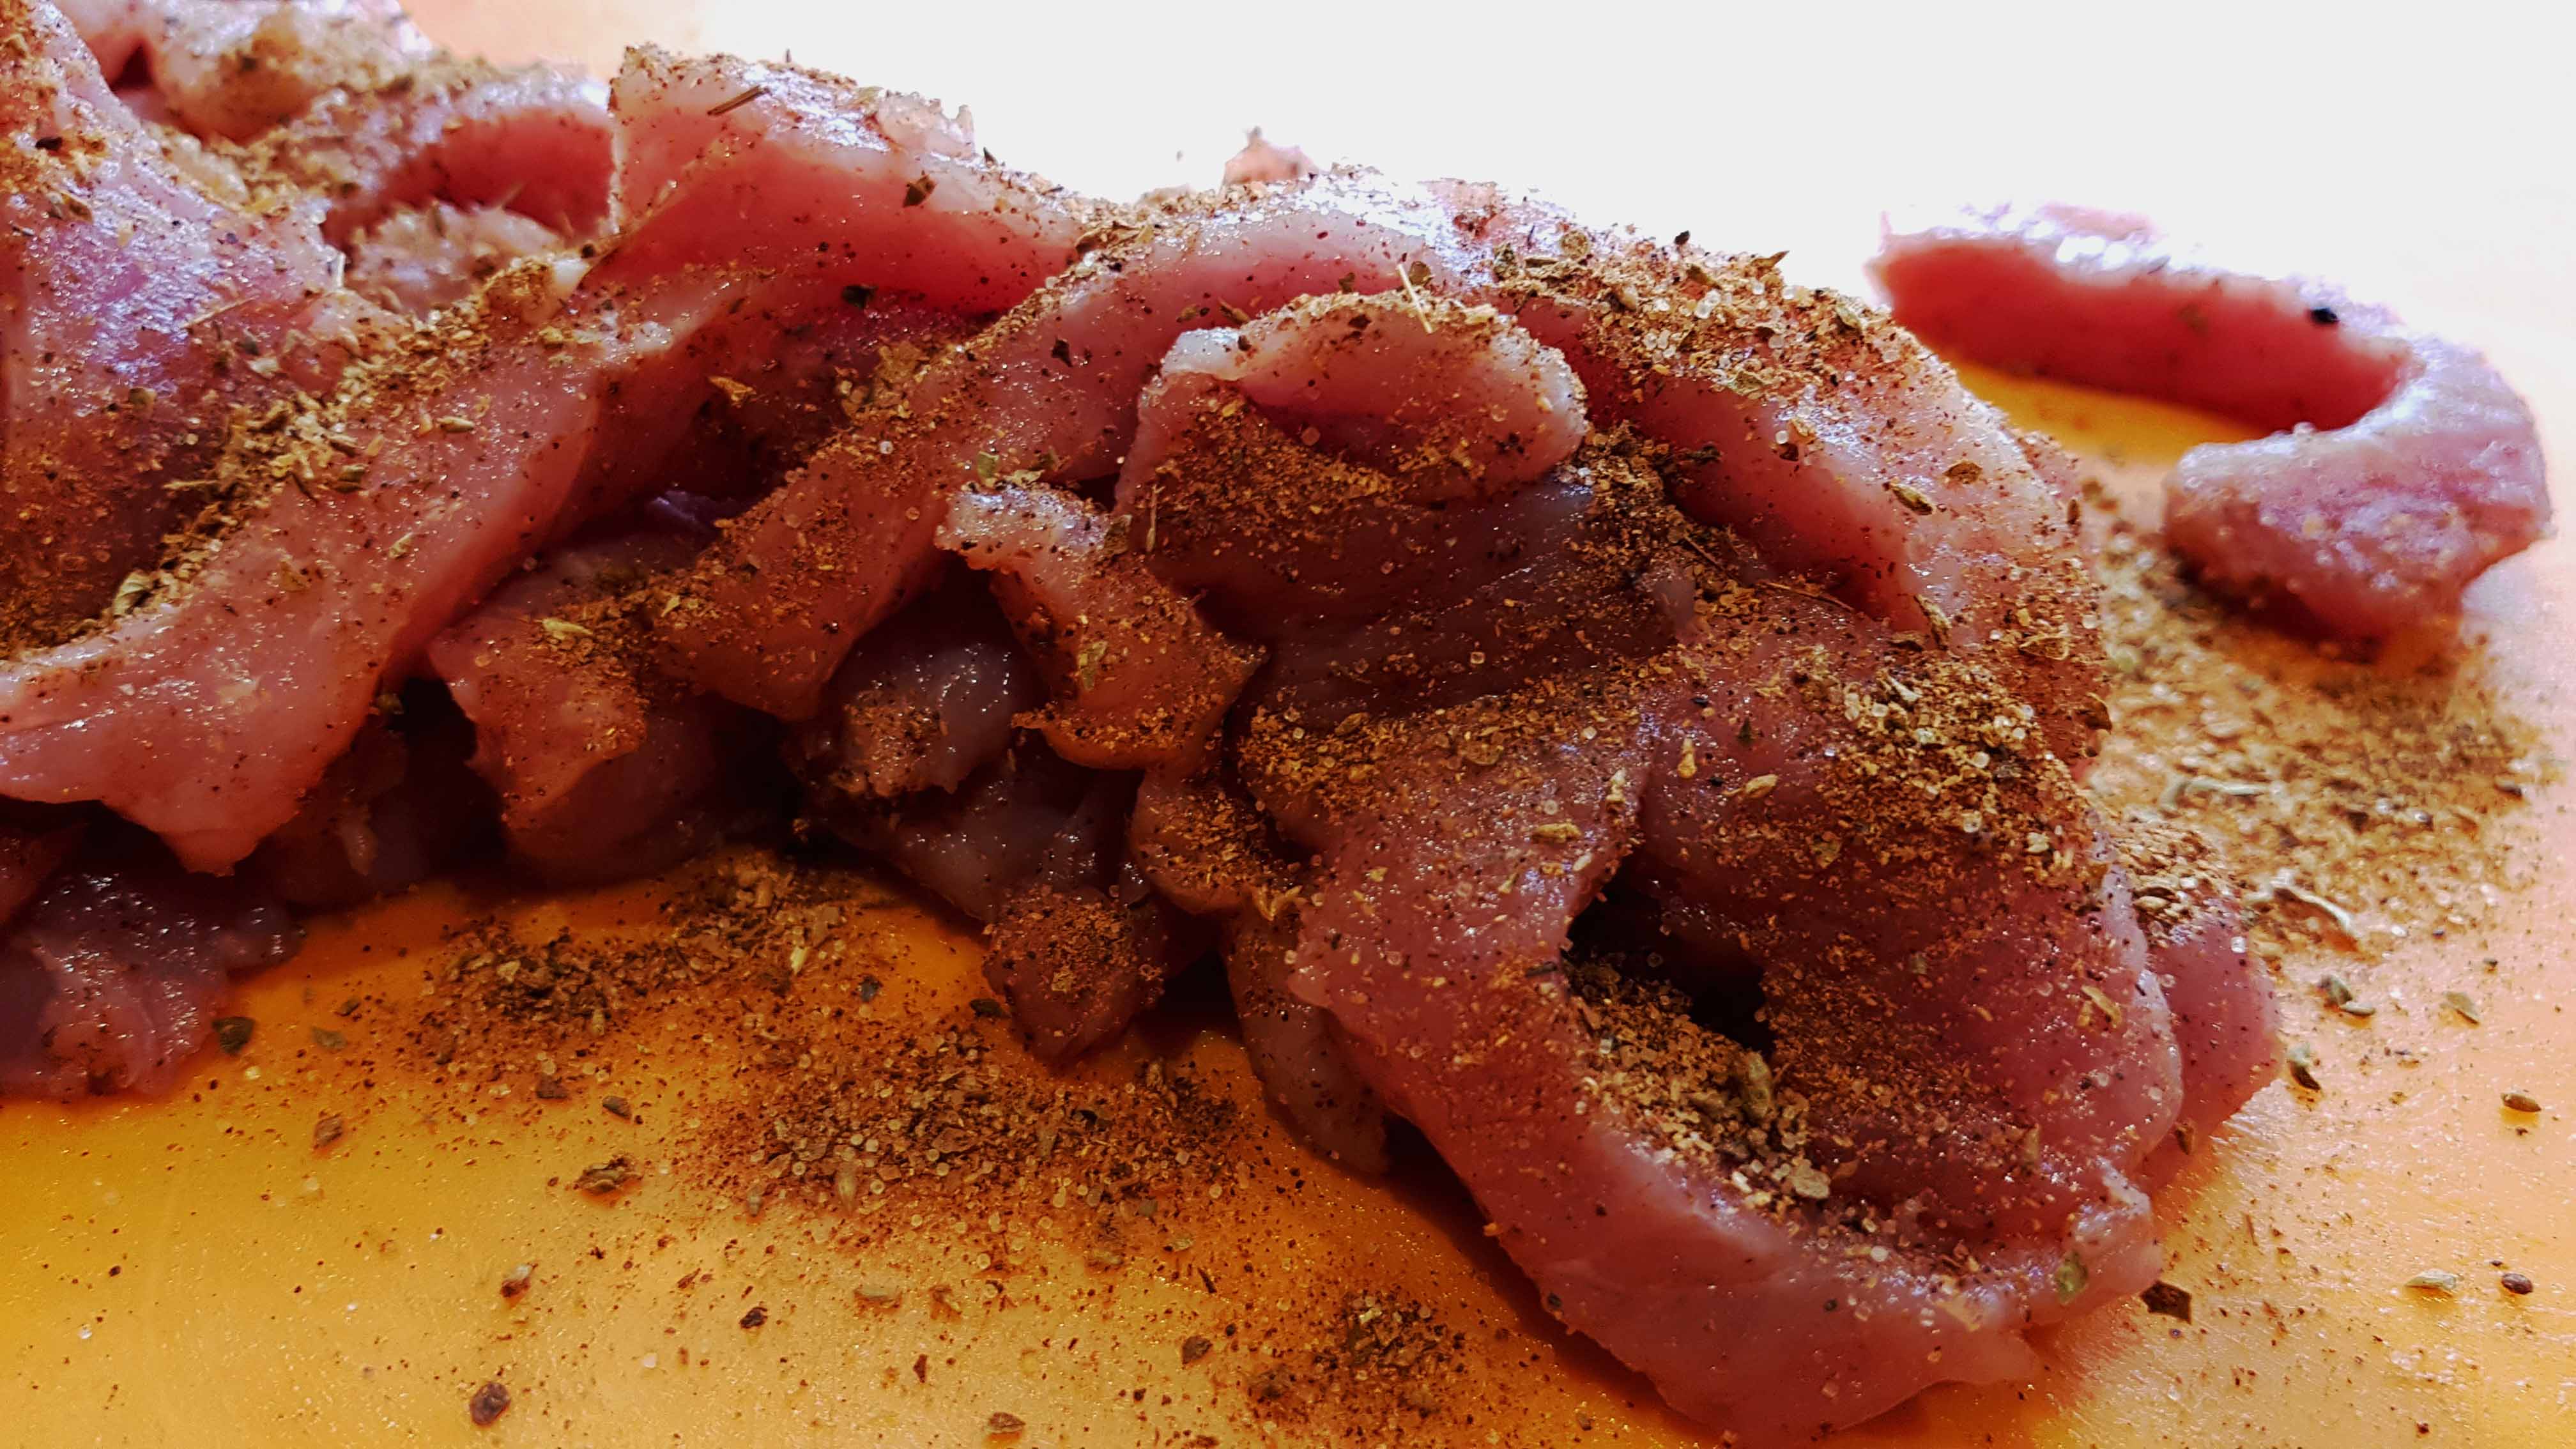
Gyros
- 2-3 pork cutlets cut into strips
- Gyros spice (from my buddies Kleanthis and Xristos)
- salt and pepper
Season and fry the meat so that it has a nice colour and set aside.
additional ingridients - onions / herbs / etc
Metaxa -Sauce (recipe by BBQPit)
- 8cl metaxa (5 stars)
- 2 cloves garlic
- 4 tablespoons tomato paste (Greek from Kyknos)
- 300 g cream fraiche
- 150 ml milk
- 1 tsp gyros spice
- Oregano

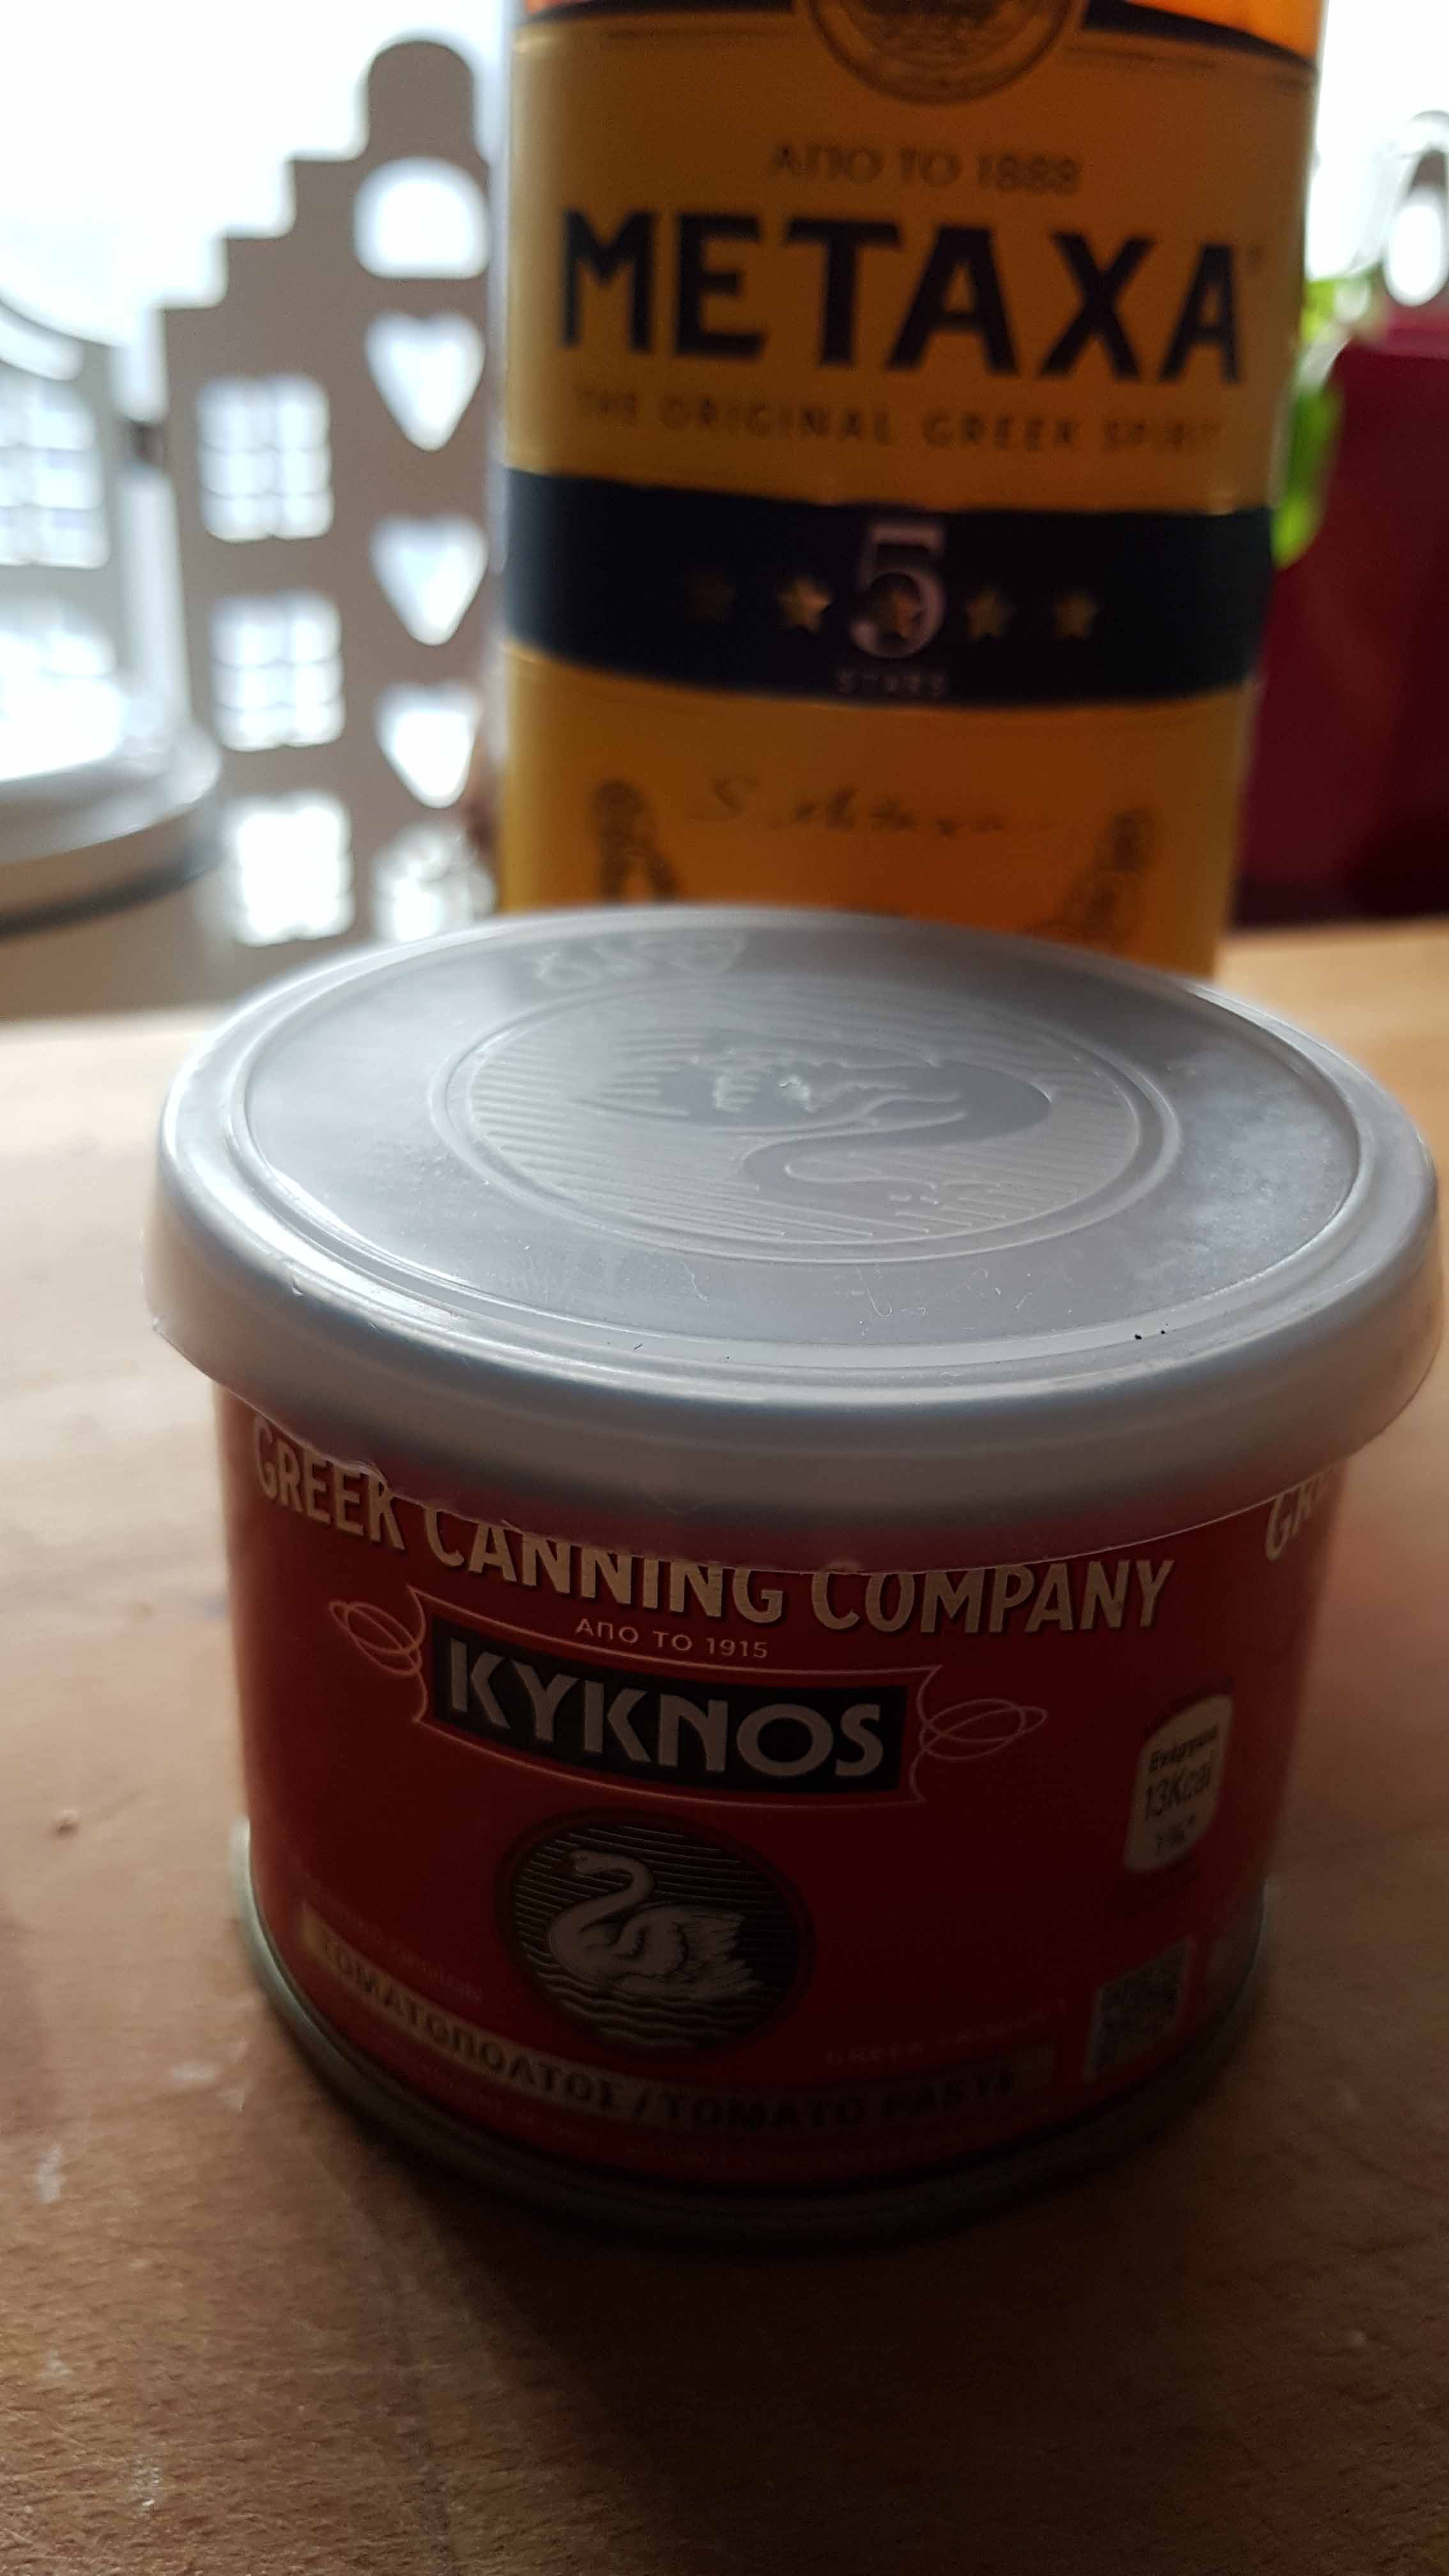

Fry the garlic and the tomato paste lightly. Deglaze with Metaxa. Add the milk, cream, fraiche and spices and simmer until the sauce thickens. Finish with a little oregano. Ready.
- 1 Pck Feta (possibly only 1/2 Pckg or less)
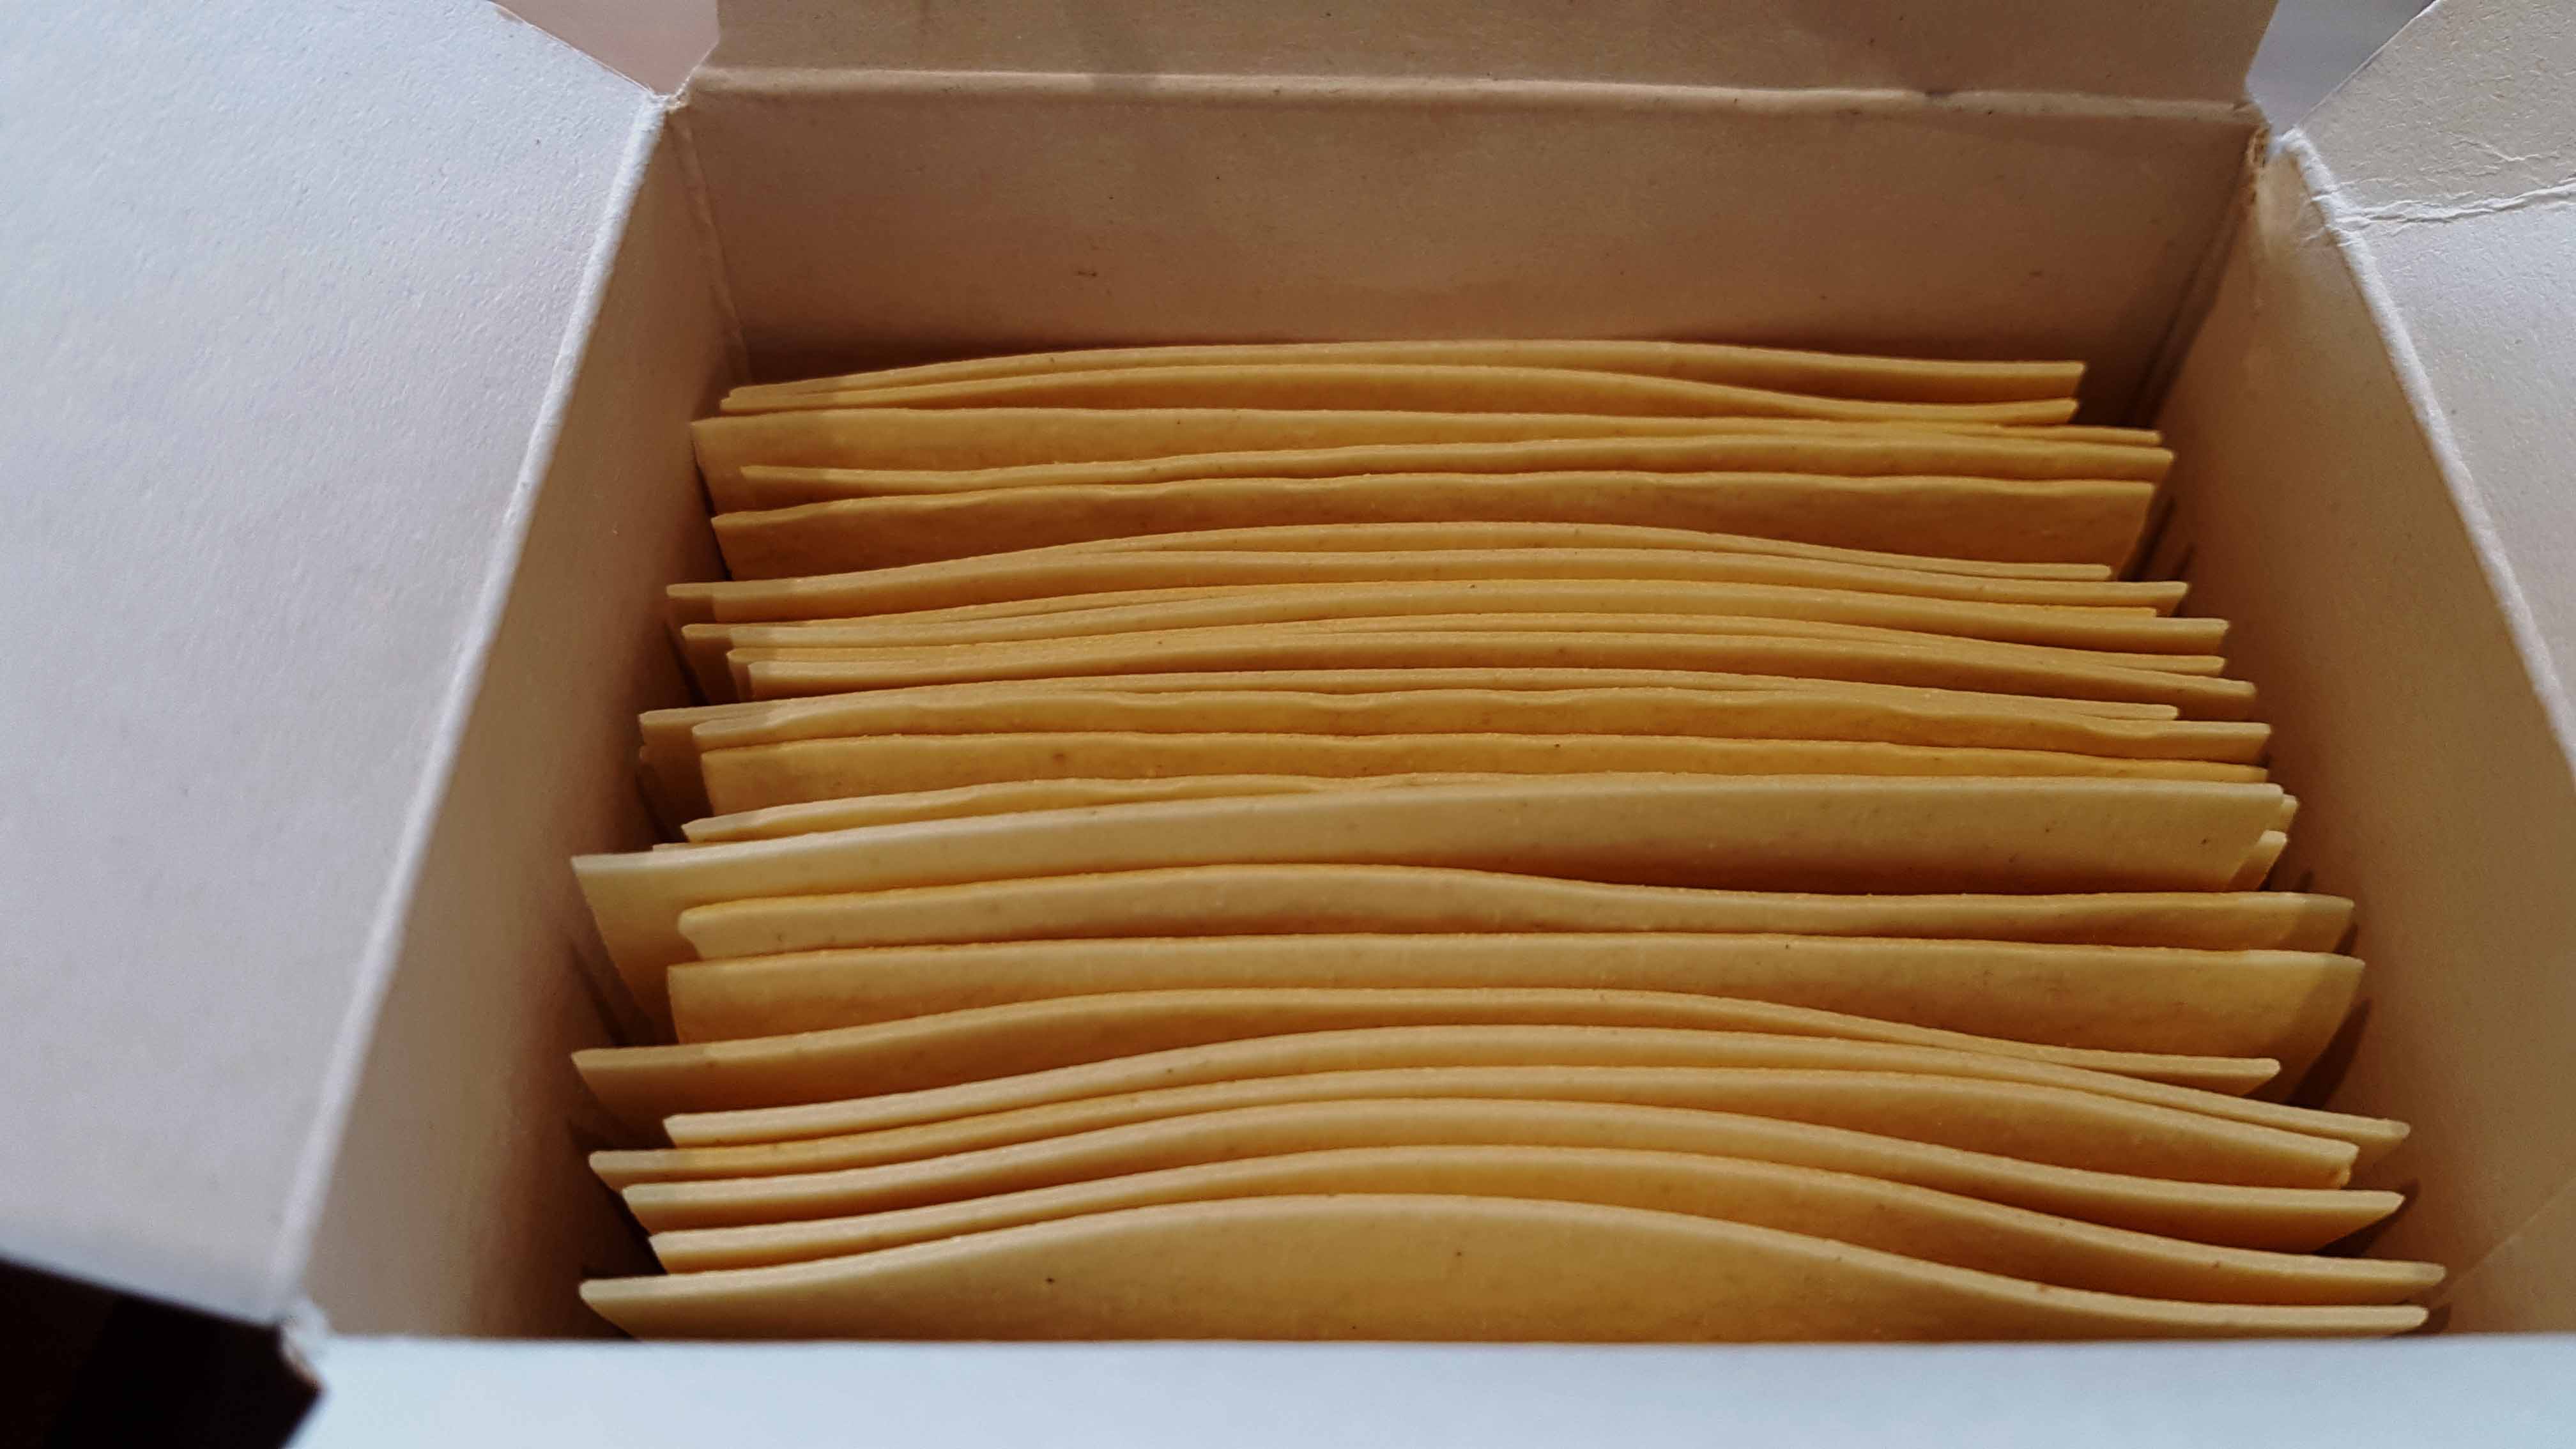
- Lasagne plates (dry, not fresh)
- grated cheese
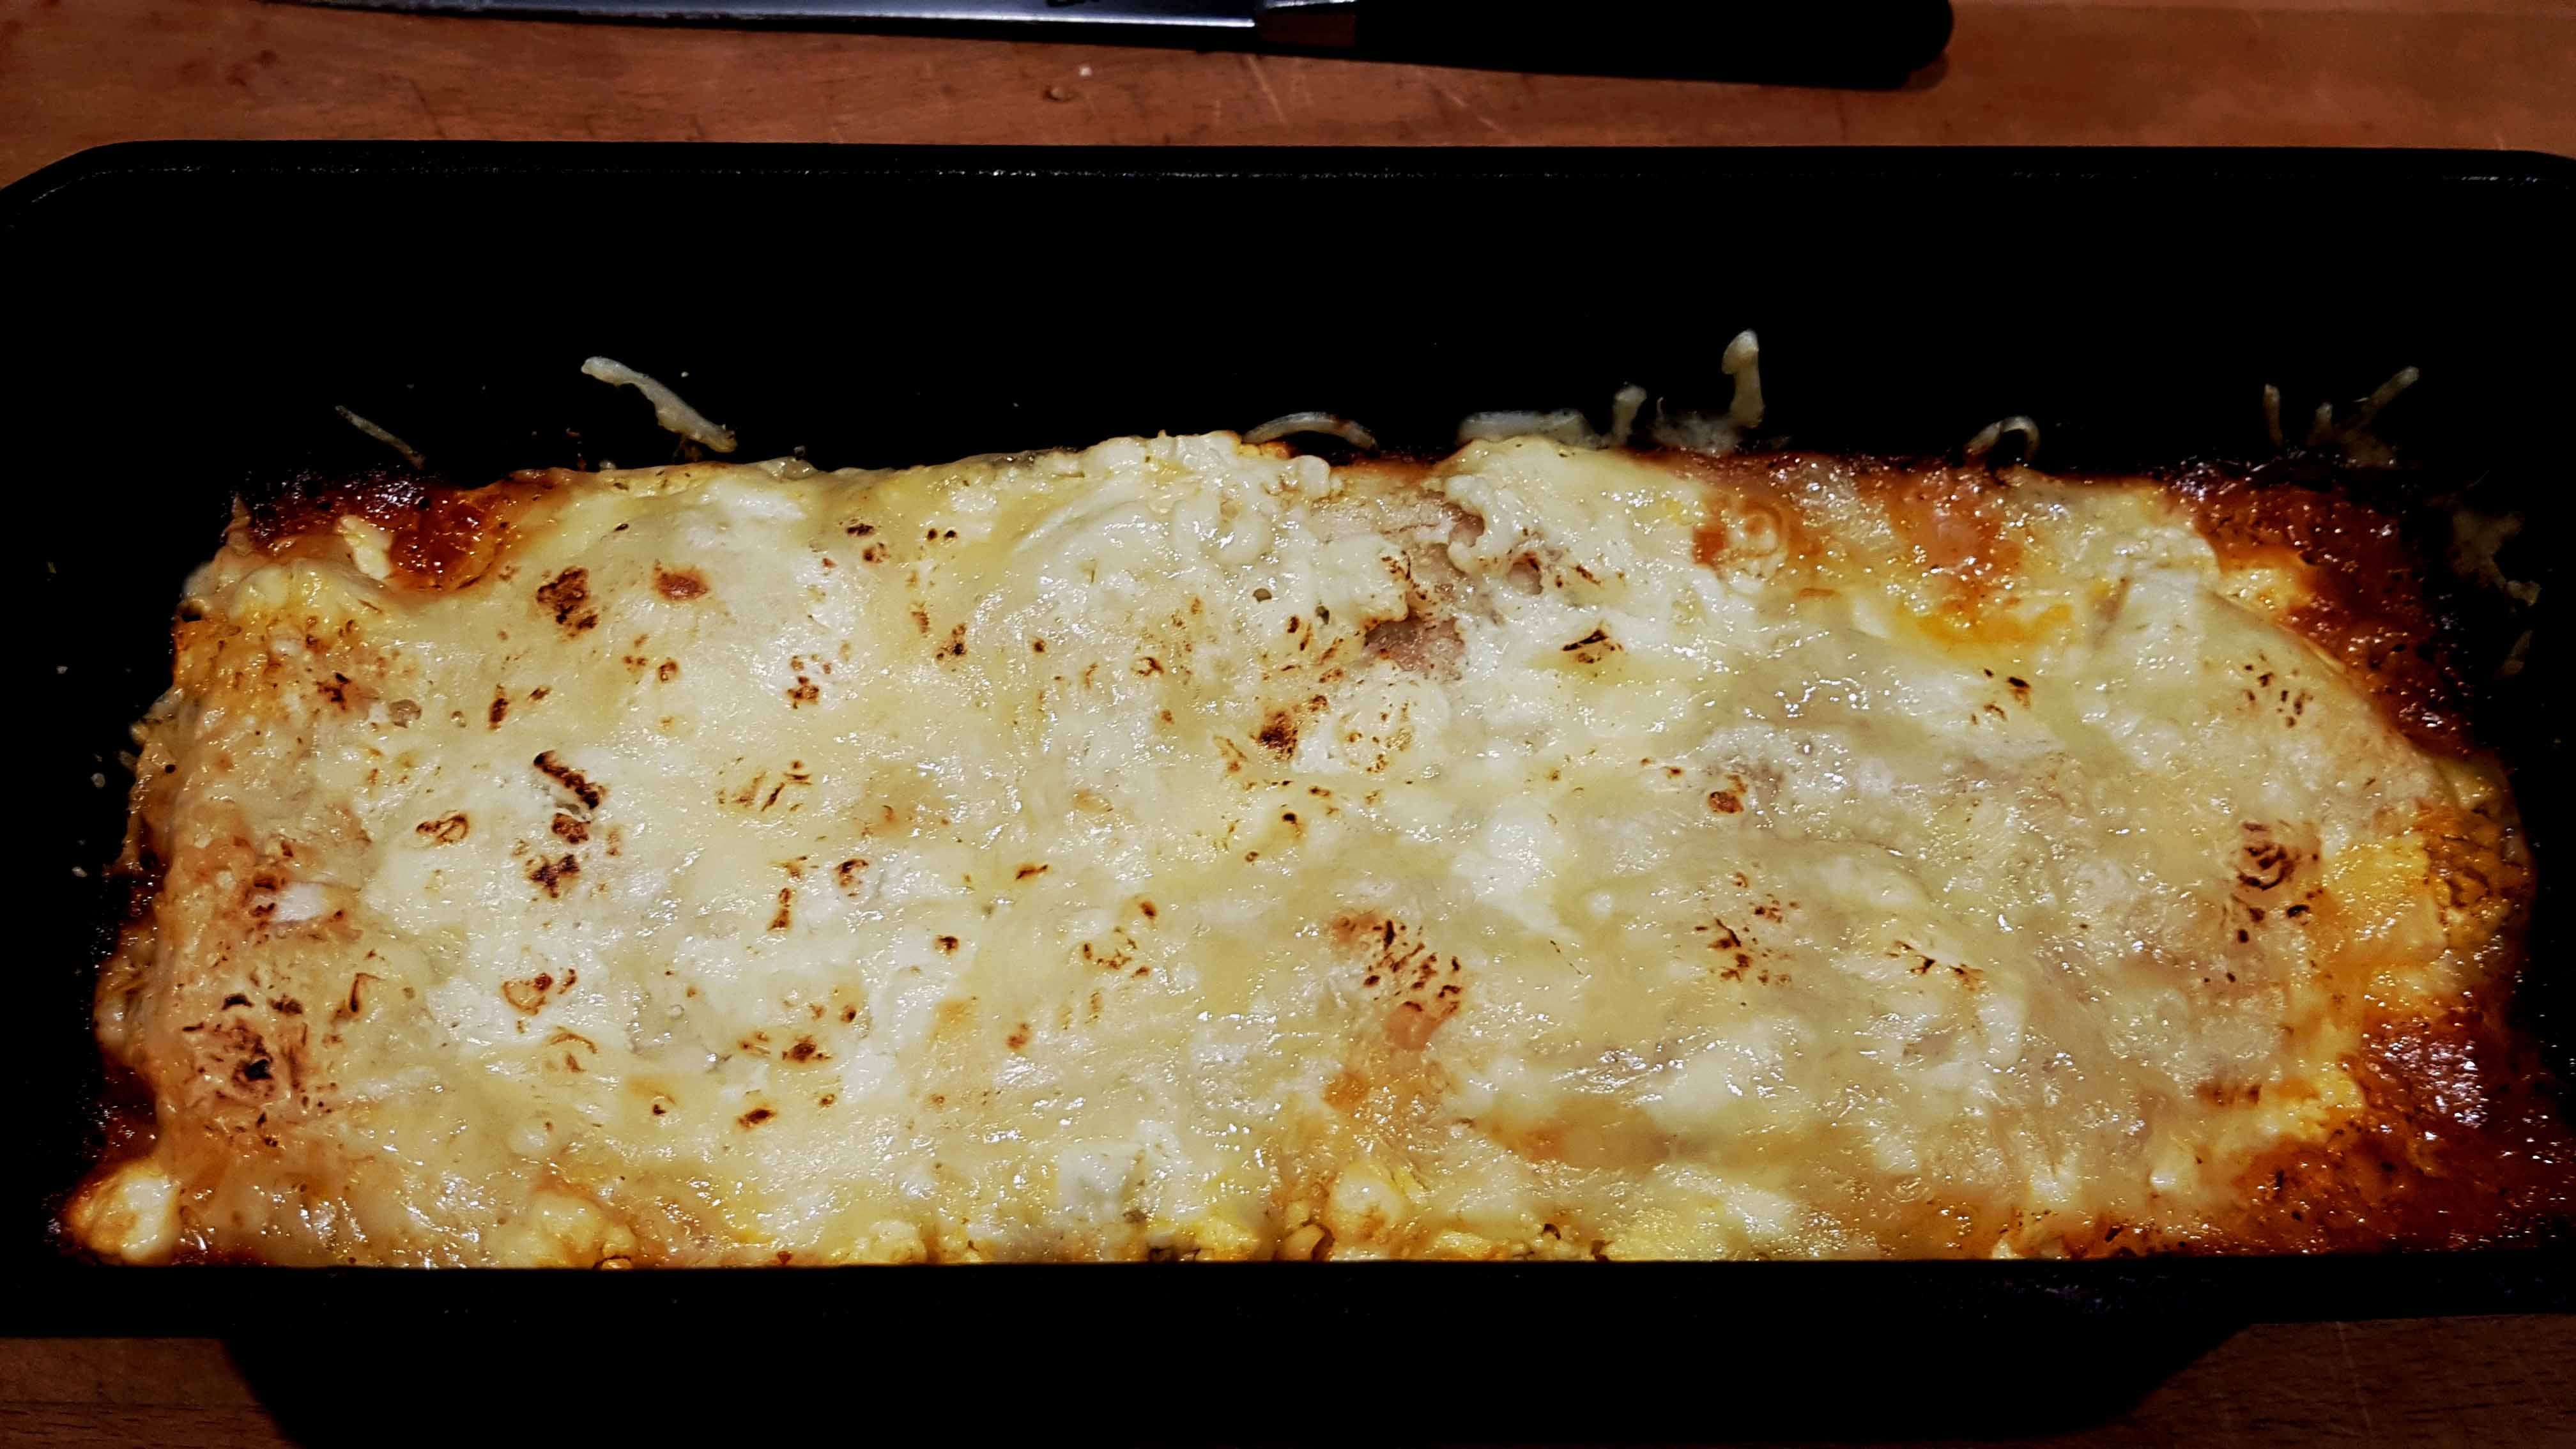
Assambling:
Grease the mould well.
First layer gyros. Spread gyros strips, put sauce on top and cover with a noodle plate. The noodle plates are the perfect size for the small box shape of Petromax.
So you can layer them alternately. I replaced one meat layer with Feta which gives the whole thing even more flavour.
Feta and grated cheese form the final layer.


The Kamado is prepared with deflector stone and the second level and the heat should be set at 200-230 degrees. Until it bubbles nicely and the cheese is melted, leave the lid on the mold, then remove the lid and let the surface tan golden brown.

Delicious! Unfortunately there was nothing left for the lunch break tomorrow.
Next time I would use a little less feta, so that the taste of this absolutely delicious sauce is more present.
—————————————————————————————————————
Falafel – Hummus Pizza
We love the kitchen from Israel and the far east. We´ve seen many of travel reports on TV where the goal of the food Bades on tradition and differences of regions.
Inspired by the wonderful Haya Molcho and Yottam Ottlenghi we try to include their ideas in our own kitchen.
Colours, freshness and spices are the main actors in their recpies written down in beautiful cook books.
My idea was a pizza without the typical tomatoe-cheese base.

So th eresult was a Falafel Pizza with Hummus, red an yellow beetroot, Halloumi cheese, Onions, Olives, red pickled Jalapenos and capers.
Oh what a fantastic smell was coming out of the kitchen.
The hummus was made fresh, the falafel where brought by my husband, a real nice ready to eat product.
Ingridients pizza dough:
* 500g flour
* 1/2 sachet dry yeast
* a lace of olivenoil
* lukewarm water (below 38°C)
* 2 tsp salt (or less/more)
Knead all ingredients into a smooth dough and leave to rise for 45-60 minutes.
Ingridients Hummus:
- 1 tin of chickpeas (400g)
- 4 tbsp Tahini
- 6 tbsp olive oil
- zests of a lemon
- juice of half a lemon
- 2 cloves of garlic
- parsley
- salt
- pepper
- 1TL cumin
- 1 tsp Zatar
Drain the chickpeas and put them into the mixer together with the remaining ingredients. Puree finely, if necessary add some water and olive oil if the mixture becomes too stiff.
Season to taste, ready.
Pizza Topping:
- Falafel (chickpea balls, also as a finished product, that’s ok)
- 1 red and 1 yellow beet each (fresh)
- Halloumi
- thin onion rings
- black olives
- pickled red jalapenos finely chopped
- capers
While the dough is setting and after the hummus is finished, I cut the yellow and red beets into slices and cooked them with a little olive oil. I did that exceptionally in the microwave because it goes fast.
That´s all.
Put the pizza stone in the oven and let it preheat to full heat.

Divide the pizza dough into portions and roll out thinly on a floured surface.
Spread the hummus on top, add the falafel and grate the halloumi over it.
Now put the olives, chillies, onions and capers on top and put the pizza the oven.
Tip: The pizza dough slips off the slider more easily if you add some semolina (under the dough) instead of flour.
The smell is incredible!

It doesn’t take that long to finish the pizza. The edge should be nice golden brown, then I would take it out.

How do I describe the aromas, the taste and the smelling?
A holiday is probably a good comparison. Orient and Mediterranean, sun and water, a glass of wine in your hand and looking into the sunset.
All this pleasures with just one bite into my Falafel Pizza! Try it and come with me on the journey!
—————————————————————————————————————
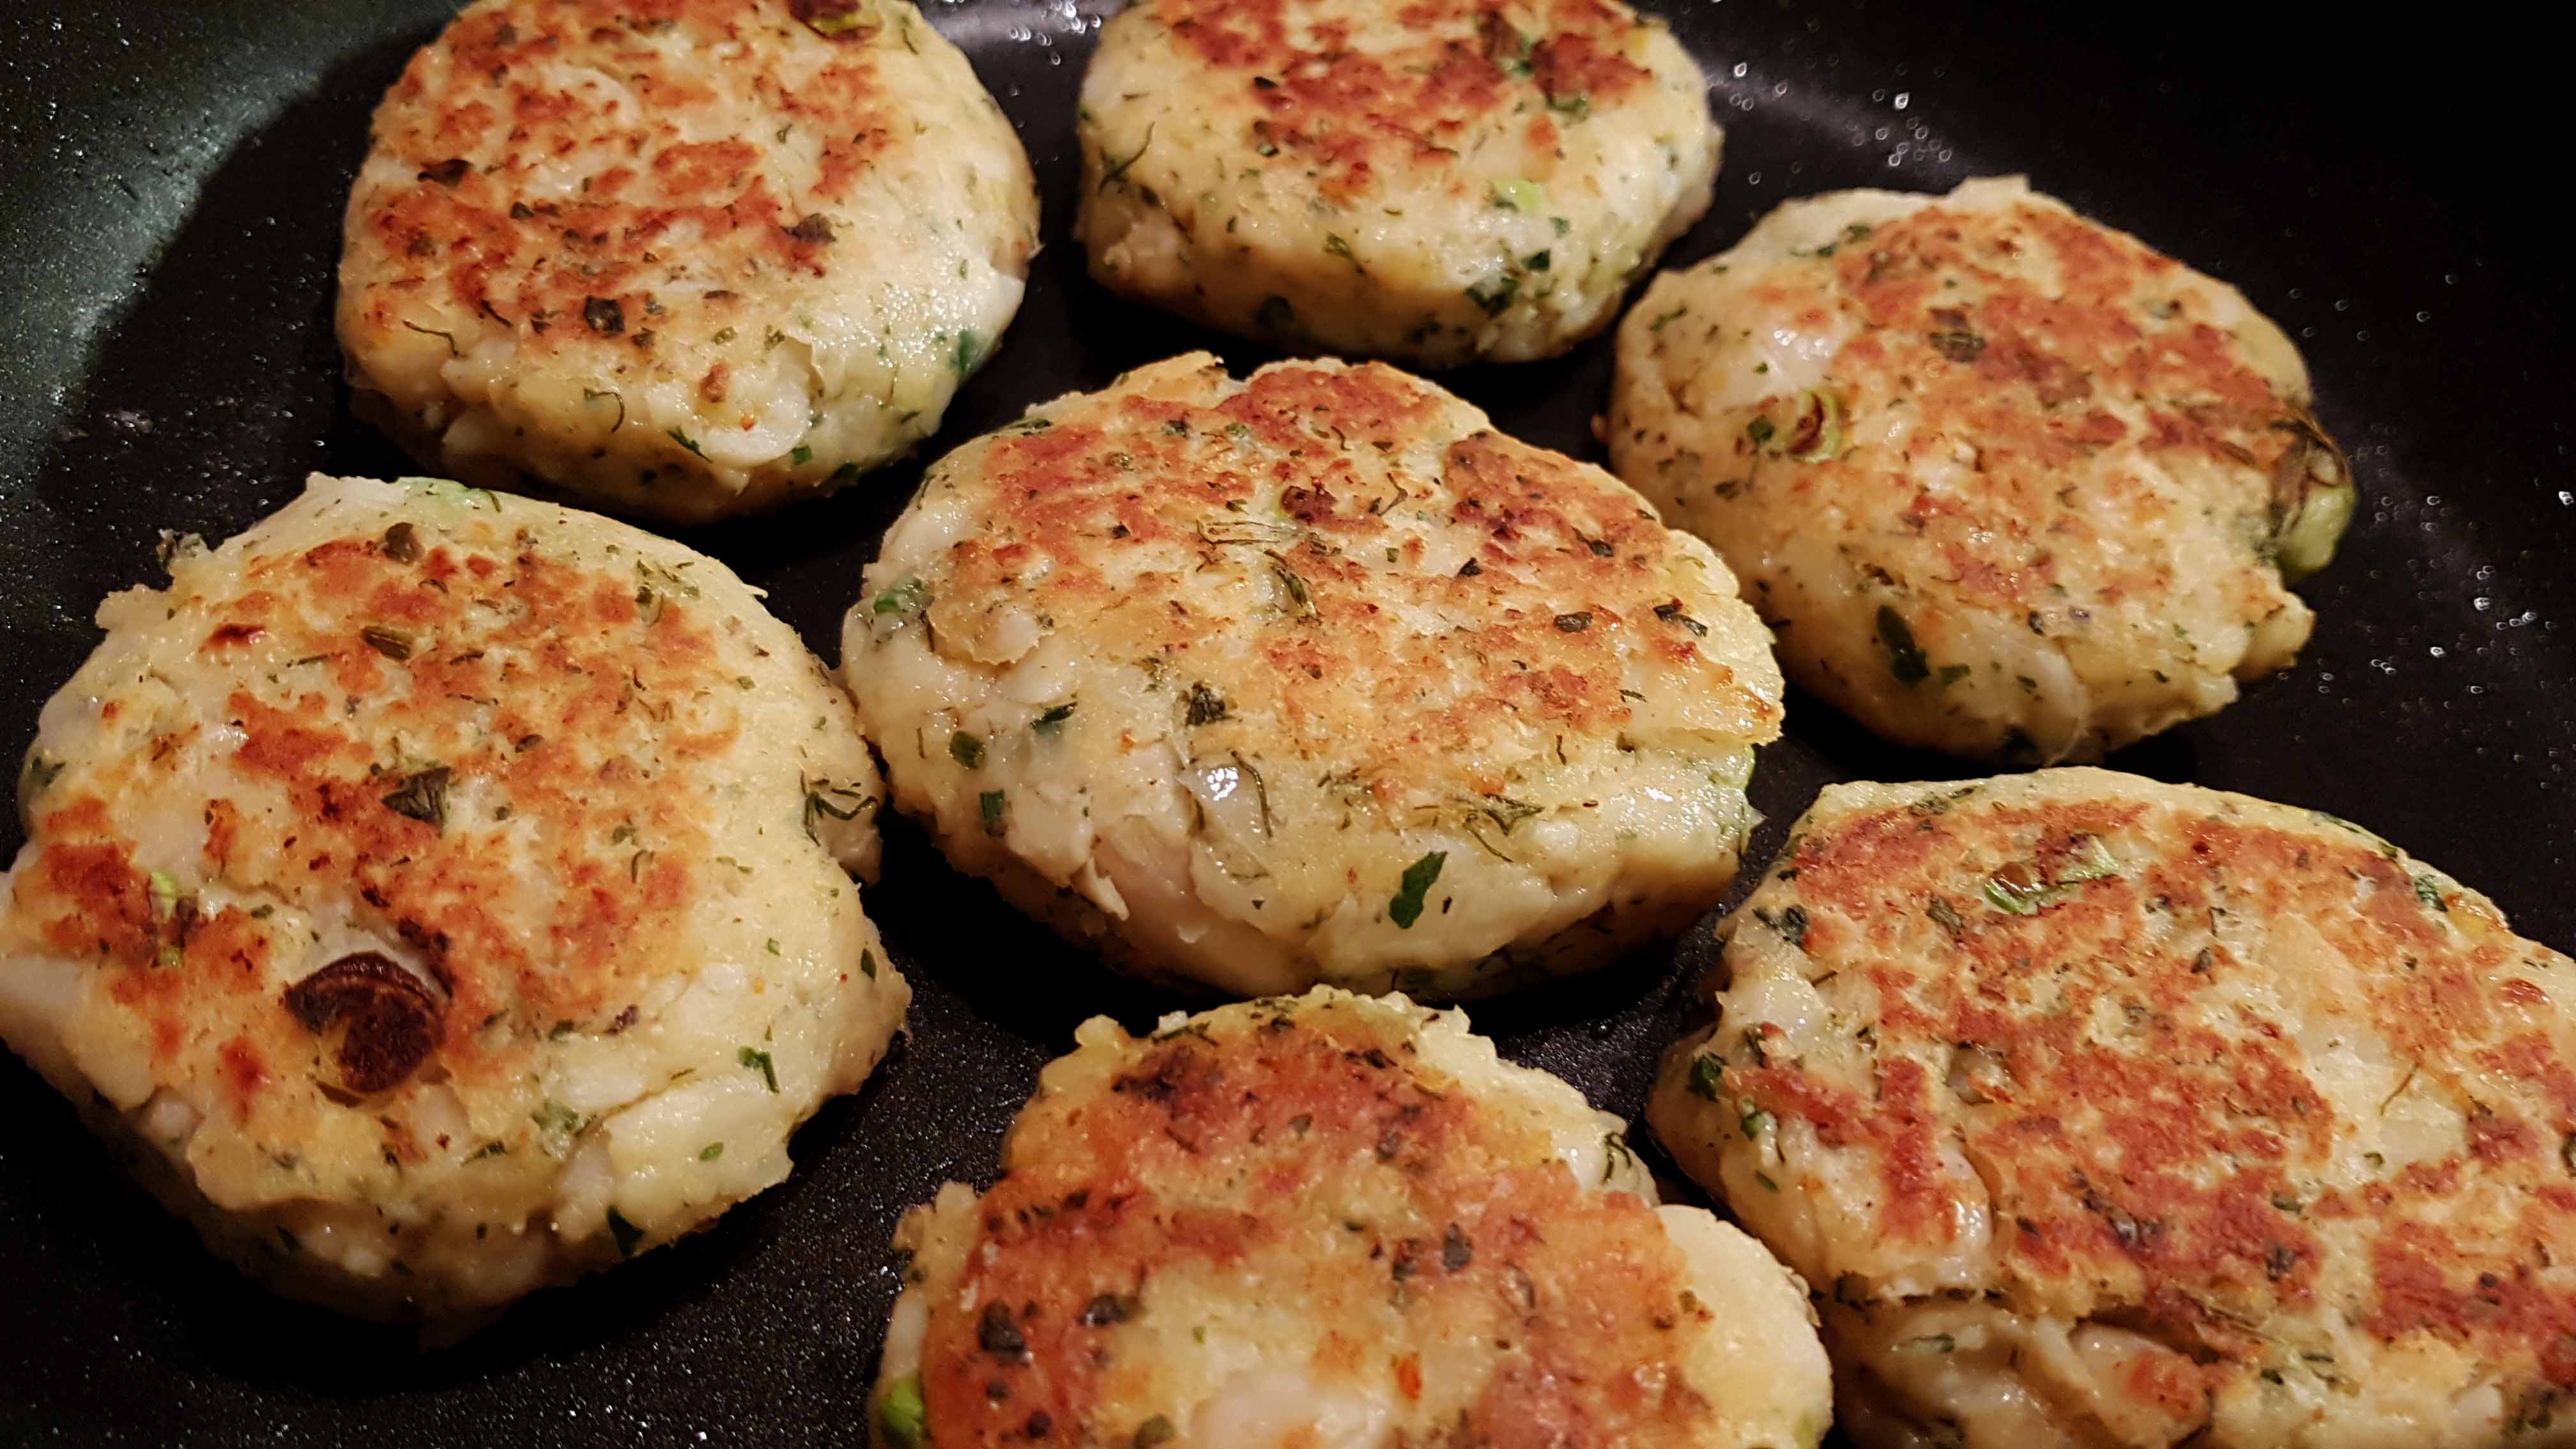
Vegetarian: Beanballs with fried rice and a fresh yoghurt dip
{contains unsolicited advertising}
Again no time to go shopping? Then I recommend a quick look into the pantry.
A large glass of white beans and filled vine leaves were standing right in front of me.
I still had rice from the day before and the rest of the ingredients I had in the fridge, because I always have Parmesan cheese and eggs there.
The dish is really quick to prepare and tastes absolutely delicious.


Ingredients: (for 13 pieces, palm size… Ladies)
- a big glass of white beans
- 2 eggs
- 60g Parmesan cheese, grated
- 2 small spring onions finely chopped
- 1 clove garlic grated
- Parsley, chopped
- nutmeg, smoked paprika powder, Rührei deluxe, a spice from spicebar, pepper, salt
- breadcrumbs, a handful (depending on consistency)
- 1 tablespoon Alba oil for frying
Pour the beans into a sieve and wash off with cold water. Then drain well so that the mixture does not become watery later.
Coarsely chop the beans and put them in a bowl.
Grate the parmesan, add the eggs and spices and mix well.
Add the breadcrumbs at the end, the mixture should not have a too soft consistency, you must be able to form a „meatball“ without problems. So dose carefully.


The meatballs I formed with wet hands, then nothing sticks. Cut off the mass with a tablespoon, then the balls will be nice and even. Flaten them a little bit.
They are baked at medium heat in a coated pan with some Alba oil, which has a fine butter taste.
They are ready when they have a nice colour on both sides.
For the dip I mixed some yoghurt, herbs, lemon juice, salt and pepper. A nice fresh and light sauce that goes great with the bean meatballs

The rice is placed in a separate pan and fried crispy.
The filled vine leaves I have warmed in a pot slightly, because they taste best lukewarm.

